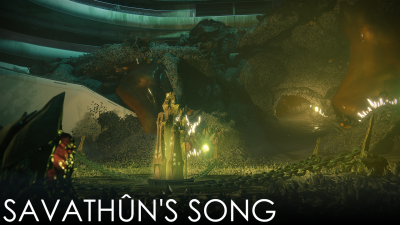
Savathûn's Song
| |
This page describes content which is not available in the game. |
|---|---|
| "Savathûn's Song" was moved into the Destiny Content Vault in |
| Savathûn's Song | |
|---|---|

| |
| Information | |
| Location | Titan |
| Players | 1-3 |
| Power | 750 |
| Expansion | |
| Enemies | Hive, Fallen |
| Boss | Savathûn's Song (Shrieker) |
| Description | Delve deep into the Hive-infested Arcology in search of missing fireteams. |
Savathûn's Song is a strike located on Titan.
Contents
Overview
Enemies Encountered
Players face Hive enemies here, but there is a variation with the Fallen combatants in some portions of the strike.
Boss
- Savathûn's Song (Shrieker)
Walkthrough
Solarium
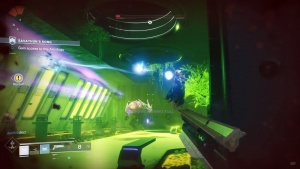
Once the Strike starts in The Rig, cross the bridge and head for the broken LED wall. Deal with the Acolytes guarding it and go through the narrow opening. Once inside the Solarium, take a left and take on the group of Acolytes and the Wizard that will cross your path. Watch out for some traps on the ground that can damage you and slow you down.
Let Ghost hack the door and immediately turn around to deal with a wave of Thralls and a Wizard. Prioritize clearing the Thralls or you might be swarmed before you know it. In the next wave, some Acolytes will arrive alongside a group of Cursed Thralls. Shoot the Cursed Thralls first to explode them in clusters before they reach your position, then turn to the Acolytes. With them gone, a couple of Knights will attack you. If you absolutely have to, use some grenades and offensive abilities to drop them, but try to save those if you can.
The moment the door opens, back up and deal with the charging Thralls. Do not use your grenades here, as you will need all the firepower you possess in just a minute.
Moving forward and through the second inner door, you will come across a Hungering Ogre, accompanied by some Knights and Acolytes. Back up and take cover the moment you see this group. This is what you have been saving your offensive abilities for, so let them loose now. Grenades are highly encouraged, as well as a Super from one of your teammates (preferably a ranged one). Clear the entire area however you see fit and head deeper into the Arboretum.
Arboretum
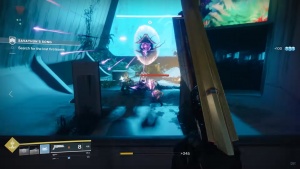
Dodge the Hive traps (if you do get caught in one, aim down and damage the center crystal to temporarily disarm it) and take out whatever Acolytes you come across, as you make your way towards the main hall. There, take a left and have two teammates deal with the Savathûn's Handmaiden (Wizard) and Acolytes in the area. The group's tank must immediately head up the steps, grab a Void charge, and push forward just below the floating shielded Shrieker ahead. The designated Void charge carrier must dodge the Shrieker fire and deposit the charge in the marked receptacle. This will open the way forward and destroy the Shrieker.
Drop down the now-open path and scan the object in the middle of the Hive nest. To proceed further downward, you need to find more similar crystals in two of three caves and destroy them. These three caves are both on a loop which you will traverse for this portion of the Strike. Depending on which route is chosen for you, the direction of traversal will either be clockwise or counterclockwise; however, both routes will have the fireteam encounter a Crystal Cave, then the Ogre Encounter, then a second Crystal Cave, then the Ritual Encounter, then an empty Crystal Cave (no crystals or enemies), before returning to their starting location.Moving on, you will come across the second Hungering Ogre. It will be accompanied by some Knights, Acolytes, Wizards, and the third Hungering Ogre in the upper mezzanine. Also, look out for traps on the ground. Do not rush this encounter. Instead, stay back and slowly make your way forward, dealing with threats in as small groups as possible.
Moving on, reach a cave with glowing crystals to destroy. Deal with the Elite enemies in your immediate surroundings, then blast the crystals and move on.
In the upper mezzanine, you will have to disrupt a Hive ritual being conducted by Savathûn's Handmaidens. Use the same strategy as before - stay back, take it slow, and stick to cover. Press on through the Acolytes and Knights to reach the Elite Wizards. Have one teammate blast them to bits, while the other two provide covering fire and deal with the additional cannon fodder.
This is where things start to get hectic. At this point, you will be presented with a wide array of threats, including Knights, Acolytes, and the last Hungering Ogre. You will also have to grab a Void charge and drop it in an area guarded by not one but two Shriekers. Work as a team and have one of you grab the charge. Then, move together so the remaining two members of the fireteam can provide covering fire and draw the bulk of the enemy's attention onto themselves. This will give the carrier a chance to move forward and deposit the Void charge in its dedicated slot. The charge carrier, if needed, can use melee attacks on enemies to temporarily blind them, making it easier for the fireteam to stay alive.
The two that cover the carrier are advised to use their Supers. One should use it when the fireteam encounters the Ogre and the other should employ it to clear out the area with the two Shriekers.
Regardless of which exit was opened to you initially, you will eventually end up back to where you dropped in from. Deal with the two Handmaidens waiting for you there, and the summoning seal will disintegrate, allowing you to drop down to the Chasm of Screams.
Chasm of Screams
Once you're down in the Chasm of Screams, take it slow. First, you will have an ungodly amount of Cursed Thralls coming your way and you don't want to run into them up close. And second, you want all of your abilities to recharge before the final boss fight. Cautiously make your way through the tunnels, while watching out for groups of Cursed Thralls. Make sure to drop those from a safe distance, because in such tight spaces, when one explodes, it will probably trigger a chain reaction and destroy the rest.
Once you enter the main chamber, stop and look around. On the far side of the room, there is a drop to a bottomless abyss, so mind that gap. On the western side, there will be a large crystal, as well as some entry points for additional enemies to come out of.
Spread out, so you are not clustered together and position yourselves with a good view towards the large crystal. Have one teammate smash it open and behold the final boss - an Ultra Shrieker known as Savathûn's Song.At this point, it is usually a good idea to distribute the workload.
- Have one hard-hitting teammate focus on the boss and only engage other enemies when they are an active threat to their position or Savathûn's Song becomes invulnerable. They should constantly aim at the Shrieker's central core (or the crack in the back if the core is facing away from them) for precision damage.
- The second teammate should focus solely on the lesser enemies and ignore Savathûn's Song. It would be beneficial if they know how to communicate enemy positions effectively and they know what to expect during each enemy wave.
- The third member of your fireteam should alternate between doing damage to Savathûn's Song and providing covering fire for the main damage dealer. Make sure they understand that their role is to shoot enemies down, not call their positions. Have only one person give the live commentary on enemy assaults to avoid confusion.
Keep damaging Savathûn's Song until a third of its health is gone. At that point, it will close up and retreat to the edge of the chamber. You will also be swarmed by some additional Hive infantry. While the Shrieker is closed, all three fireteam members should focus on the cannon fodder. This is a good time to also restock on ammo, but make sure to save your Super abilities.
Once Savathûn's Song opens its eye again, it will teleport to the far end of its balcony. Employ the same strategy as before and make sure everyone knows their roles. The main damage dealer will rely heavily on covering fire, due to the near-constant stream of Acolytes that will swarm the area. When two or three normal Ogres arrive, let your Supers loose and deal with them before refocusing on Savathûn's Song.
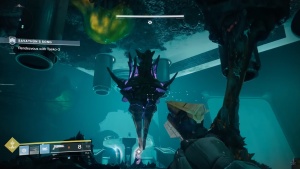
When the boss loses another third of its health, it will teleport to the top of the nearby floating platform and receive an invincibility shield. At the same time, a Handmaiden will appear where the boss was when the fight began - slay it, and a Void charge will appear. Grabbing the Void charge will cause two more Handmaidens to appear , so have two teammates focus on the Wizards, while the third (usually the one that can shrug off the most damage) grabs the charge and rushes in to deposit it in the marked location and dissipate the invincibility shield.
Once the charge is deposited, assume your default roles, deal with the remaining Wizards, and watch out for Cursed Thralls while you chip away at Savathûn's Song's health. Lowering the boss Shrieker's health to zero completes this Strike.
 Independent Study — The Chasm of Screams
A reprise of this strike named The Chasm of Screams is accessible during the ![]() Independent Study Exotic Quest, and replaces direct access to Savathûn's Song until the strike is completed. While the level is reused, there is no dialogue in this strike. There are extra enemies in this activity, notably Ultra Hive Knights.
Independent Study Exotic Quest, and replaces direct access to Savathûn's Song until the strike is completed. While the level is reused, there is no dialogue in this strike. There are extra enemies in this activity, notably Ultra Hive Knights.
- Three Shriekers spawn in the Solarium's main hall.
- Nydor, Arbiter spawns at the first Void charge
- Hadaa, Arbiter spawns at the second void charge.
- Arbiters Sardav and Telesh spawn during the last phase of the boss encounter.
Timewarp: Anomaly Locations
Prior to version 1.1.3, the Timewarp: Anomalies Modifier spawned anomalies which always appeared in a specific set of locations, given below:
First room
- Above the crack
- Far side of room
Open area in arcology
- In the spire next to the room on the left
- Above where you enter the arcology
- Far side of open area
Ogre room
- Just above entrance inside Ogre room
"Trench" hallway
- Ceiling
Screen/shrieker room
- Little room on left
- On upper level on right before shrieker
- Hidden on ceiling - look up from shrieker
Summoning seal room
- Right across/above as you run in
- On the right as you exit shrieker room
- In the crater, to the right
- In the crater, across
The Ogre/Witch room
- Up on the left, as you walk in
- Above the entrance to the room
- Over the railing on way to second ogre
- On the left, in area where second ogre sits
Crystal room
- To the left
Next room
- Look back after the curve
- Above entrance to relic room
Relic room
- Look up, to the left
Next room
- On left
Just before Ogres
- On right
Just after shriekers
- Left side as you walk in
Witch room, before you jump down
- In cave on left
Chasm of screams
- On right as you run through
Dark hallway, room with exploding thrall
- On left behind pile of bones
- Just after the room on ceiling
- Just before boss room
Reward
The Nightfall version of this strike has a chance to drop Duty Bound.
| |
|
| |


