Lake of Shadows
| Lake of Shadows | |
|---|---|

| |
| Information | |
| Location | European Dead Zone |
| Players | 1-3 |
| Power | 1050 |
| Expansion | |
| Enemies | Cabal, Fallen, Taken |
| Boss | Grask, the Consumed (Taken Phalanx) |
| Description | Stem the tide of Taken flowing into the European Dead Zone from beneath the waves. |
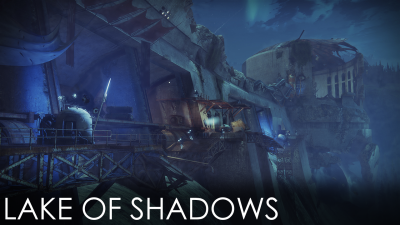
The Lake of Shadows is a strike located in the European Dead Zone.
Contents
Overview
Enemies Encountered
| Shields | |||
|---|---|---|---|
| Normal | - | - | - |
| Adept | |
|
|
| Hero | |
|
|
| Legend | |
|
|
| Master | |
|
|
| Grandmaster | |
|
|
| Enemies | Champions | ||
| Fallen, Taken | | ||
| |
Boss
- Grask, the Consumed (Taken Phalanx)
Walkthrough
Trostland and Maevic Square
Starting off, you need to head to the cemetery south of the church. There, you will come across some Fallen and Cabal that will be engaged in a fight, just like in the normal European Dead Zone. If you wipe them all out, more enemies will arrive to replace the ones you killed, so don't spend too much time fighting them. Instead, make your way towards Maevic Square.
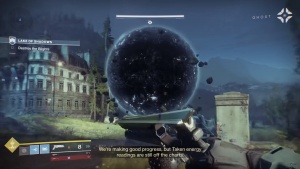
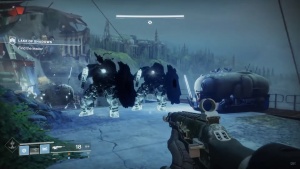
Once you reach the square and come across a group of Taken, your objective will update. Your new task is to get rid of the Blight spheres, but those are protected by some shields that you need to get inside in order to do any damage. Furthermore, you will encounter some Taken forces, including Taken Centurions, Taken Psions, and Taken Phalanxes.
Shotguns can be extremely useful in completing this objective, but you must be mindful of the random enemies around you. It's advised to wipe out the defending Taken first, then focus on the domes.
Once the first Blight is destroyed, head to the northeast and make your way to the second one through some Taken Hobgoblins, Taken Thralls, and more Taken Phalanxes. Once there, avoid stepping in the black goo or it will hurt you. Focus on dealing with the Blight once all defenders are down.
Moving on, you will enter a small shoreline plaza, the same one used by the Supply and Demand Adventure (though in that adventure, the path to the rest of the Lake of Shadows Strike is blocked by a Fallen shield). There, you will have to deal with some more Taken forces and a Blight. Beware the Taken Captains. Also, kill the Taken Goblins first, before they have a chance to link with another Taken and make them invincible. Move on towards the Trostland sign and you will find another Blight. This one is also guarded by some Taken, including a Taken Fracturer (a Major Taken Centurion). Focus all your firepower on the Major unit first, then deal with the rest the same way you did until now.
The Reservoir
Moving on, make your way through the Taken rift wall and into the north dam chamber. Once there, make slow progress down the tight stairwells. You will be met by some Taken Thralls and Taken Captains, so keep your distance and take them out as you proceed forward.
When you get to the lowest portion of the chamber, you will be attacked by a Taken Exsanguinator (a Major Taken Captain). He will create a large ball to attack you with. Be careful, as you will be fighting in confined space and his attacks will be extremely difficult to dodge. You might want to use a Super in this encounter to avoid taking unneeded damage and making the fight longer than it should be. Try to stay spaced out when fighting this enemy, so he can't damage you all at once.
Moving on, you will find yourself on the exterior of the dam. Be mindful of your strafing, as the drop down will instantly kill you. Push forward and eliminate the Phalanxes you will encounter. As you progress further along the dangerous platforms, keep your eyes open for some Taken Psions and Taken Hobgoblins in the distance.At the far end of the gantries, you will find a Taken Executioner (a Major Taken Knight). He will shield himself and the Taken Vandals that accompany him, so it might be a good idea to relocate one teammate to the inner platforms and try to flank the enemies. Either way, focus on taking the Taken Knight down before you deal with the Taken Vandals. If you decide to use a Super, do it at the end of the encounter and use it to finish off the enemy.
With this group gone, head back inside to be met by some Taken Thralls, Taken Goblins, and a normal Taken Knight. Drop the Taken Thralls first to avoid getting swarmed, then focus on the Taken Goblins. If you prioritize the Taken Knight first, you will make the fight much tougher for yourself, because the Taken Goblins will continuously heal him. Moving on, you will have a few more clusters of Taken Goblins that protect a Taken Knight each. Employ the same tactics when dealing with them.
When you enter the loading bay, a Taken Asphyxiator (a Major Taken Wizard) will be waiting for you. Focus on dropping its shield as quickly as possible, then blast him to bits with your Kinetic Weapons. Try to save your abilities for the upcoming boss battle, but if you must, use a Super and some grenades to make this fight easier for yourself.
After you defeat the Taken Asphyxiator, proceed forward through a small generator chamber. Fight your way through the Taken Thralls, Taken Psions, and Taken Vandals there, then head onward to the final battle of this Strike.
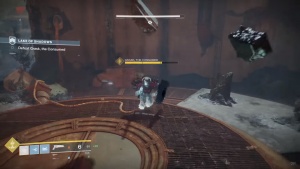
When you come across the vat chamber, have one of your teammates drop down into it and remove the Taken source, while the remaining two wipe out the Taken cannon fodder in the vicinity. This will summon the final boss of the Strike: Grask, The Consumed (an Ultra Taken Phalanx).
Grask, The Consumed
Your primary target is the boss's head. However, during the encounter, plenty of Taken Psions and Taken Knights will spawn. These can easily swarm you if you ignore them, so it's smart to designate one player who should deal with them as a priority. That Guardian should only focus on the boss when no cannon fodder is around. The second player should focus solely on the boss, while the third could alternate between the two roles whenever either needs some more firepower.Now would be a good time to use a Super on Grask so it can regenerate for the later stages of the battle.
The enemy is a special Phalanx, which means that it will rely heavily on blocking damage with its shield. To avoid getting denied clean shots on its head, strafe around it and get behind the shield (alternately, if your weapon doesn't deal that much more damage on precision hits than on non-precision hits, aim for the feet when the Phalanx raises its shield). Make sure you attack from a safe distance or be prepared to be punished for getting too close. Of course, melee Supers are an exception.
During the second phase of this encounter, the boss will begin firing some pretty powerful projectiles. Try to dodge them to the best of your abilities and keep shooting at it while keeping some space between the two of you. During this phase, the perimeter of the area will become one giant rift, so you want to watch your step. Jump across the interior platforms where lesser enemies spawn and try to stick to cover whenever possible.
Also, during the second phase, be light on your feet or you might get hit by the boss's tether. Whenever a halo materializes above Grask's head, immediately get to cover to dodge the slowing attack.
During the third phase, the boss will do everything it has been doing so far, but it will also summon some Taken Goblins that can make it invincible. Whenever you see a Taken Goblin arrive, shift all your firepower to it to drop it before it can shield Grask, The Consumed. Then, focus on the boss once more.
During all three phases of the battle, beware the boss's shield blast, since it can really knock you off your rhythm. Also, make sure to attack from several different angles to always land hits behind its shield.
With Grask destroyed, the Strike ends a short time after the Strike reward chest, shaped like a Cabal Loot Cache, materializes and spits out its contents.
Notes
- This strike was available exclusively on PS4 prior to the release of Forsaken.
Rewards
The Nightfall version of this strike has a chance to drop The Militia's Birthright.
| |
|
| |
Patch History
- 3.4.0.1[2]
- To bring this boss encounter more in line with other strikes and our modern sandbox gameplay, Grask's health has been increased by 34%, to a total of 134% of the previous value. He might last at least a minute or two against most fireteams now, even against 'ol Gally.
- Fixed an issue where if a player destroyed the second and third Blights before the first one, a number of combatants wouldn't spawn. In addition to their normal behavior, they now also spawn if you attempt to move up the alley, regardless of the status of the Blights.
- x.x.x.x
- Added to the Game
References
- ↑ "Activity Enemy Information." Google Sheets, Created by Kimber Prime with the help of ReD_ReD_PaNdA, https://docs.google.com/spreadsheets/d/1tB87AL467rpjsIAe6PkMdVI3hHQ9rGFbcwQCDCACRZI. Accessed 14 Oct. 2021.
- ↑ "Destiny Update 3.4.0.1" Bungie, posted by Hippy, 16 Dec. 2021, https://www.bungie.net/en/Explore/Detail/News/50906. wikipage


