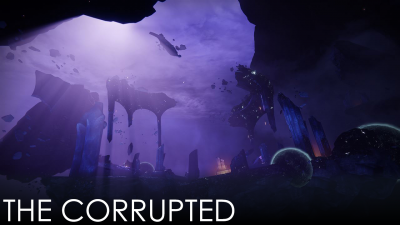
The Corrupted
| |
Not what you were looking for? |
|---|---|
| See The Corrupted (Emblem). |
| The Corrupted | |
|---|---|

| |
| Information | |
| Location | Dreaming City |
| Players | 1-3 |
| Power | 1050 |
| Expansion | |
| Enemies | Scorn, Taken, Hive |
| Boss | Sedia, the Corrupted |
| Description | Hunt down one of Queen Mara's most trusted advisors and free her from Taken possession. |
The Corrupted is a strike located in the Dreaming City.
Contents
Overview
Enemies Encountered
| Shields | |||
|---|---|---|---|
| Normal | - | - | - |
| Adept | - | - | |
| Hero | |
|
|
| Legend | |
|
|
| Master | |
|
|
| Grandmaster | |
|
|
| Enemies | Champions | ||
| Hive, Scorn, Taken | | ||
| |
Boss
- Sedia, the Corrupted
Walkthrough
Rheasilvia
You will appear in front of the entrance to the temple. Either kill the Scorn and Taken in your way, or sprint past them. A Taken Centurion will spawn in front of the portal, you must defeat it to be able to proceed.
Ascendant Plane
Throughout the strike, you will be switching between the regular dimension and the Ascendant Plane. Go straight through the door, then turn left and jump down onto a platform below. Be careful not to descend to the very bottom, it is covered with Taken blight that deals damage to the players standing in it. You will encounter Taken Minotaurs and Taken Phalanxes, but defeating them is not necessary, you can just follow the waypoint to another portal.
Temple of Illyn
Let Ghost out to get the elevator moving, and fight off waves of Taken Psions and Taken Phalanxes. A Taken Centurion will spawn, shielded from all damage. This shield can be removed by throwing a relic at it. There are two spots where relics spawn on the elevator, and passing one to an ally increases the damage it deals when they throw it at the enemy. Once the shielded enemy is down, stay away from the middle of the elevator. A large Taken blight will spawn there, the floor will also be covered in it in some places, and several orbs will be circling around the blight, avoid them. Three shielded enemies will spawn: two Taken Phalanxes and one Taken Knight, defeat them with relics.
Once the elevator descends, you will encounter Hive Acolytes, Knights, and a Shrieker. Follow the waypoints, fighting through several Knights and Shriekers on your way into a restricted zone. You have to defeat an Ogre in the normal plane and a Taken Ogre in the Ascendant Plane to be able to proceed. You will get the Castaway debuff throughout this encounter, once it ticks to zero you will be transported to a different plane. The Ogre is surrounded by Acolytes, Knights and Shriekers. The Taken Ogre is surrounded by Taken Acolytes, Taken Knights, and Shriekers. Jump into the portal at the far end of the room once you are done.
Go down the stairs, fighting Taken Thralls and Taken Phalanxes. Taken Vandals will shoot at you from the sides and wait at the bottom. Enter the Ascendant Plane and follow the waypoints to a massive drop. Jump down carefully, there are Taken blights with orbs spinning around them, they launch you away if you happen to hit one. There is a portal out of the Ascendant Plane at the bottom.
The Adytum
Follow the waypoints out into the open area and jump through debris flowing in the air, fighting the Taken along the way. You will encounter a Wanted enemy, a Taken Knight, halfway through. Once you step on the final platform, the boss fight will begin.
Sedia, The Corrupted
Sedia throws projectiles at players, and uses an AoE attack that launches them in the air. She is covered by a shield seen earlier in the elevator encounter. There are two relic spawns on the far sides of the stage, Sedia will stay near one of them, rendering it inactive. Remember that relics deal more damage when you pass them to an ally. Taken Psions and Taken Knights spawn throughout this stage.
When Sedia drop to 2/3 of her health, debris start to fly around the encounter stage, colliding with one will kill your character, so move carefully.
Once she has 1/3 health left, Sedia teleports to the Ascendant Plane. Jump through the portal and follow her across the platforms. You will encounter Taken enemies on your way, and rocks will keep flying in between the platforms. Get to the top and continue the fight. One of the relic spawns is on the side of the stage, another is on a platform in the middle, surrounded by flying rocks.
Notes
Reward
The Nightfall version of this strike has a chance to drop the Horror's Least.
| |
|
| |
References
- ↑ "Activity Enemy Information." Google Sheets, Created by Kimber Prime with the help of ReD_ReD_PaNdA, https://docs.google.com/spreadsheets/d/1tB87AL467rpjsIAe6PkMdVI3hHQ9rGFbcwQCDCACRZI. Accessed Jul 20 2021.