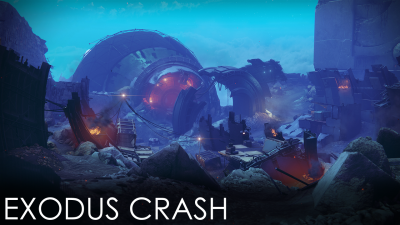
Exodus Crash
| Exodus Crash | |
|---|---|
| |
| Information | |
| Location | Nessus |
| Players | 1-3 |
| Power | 1050 |
| Expansion | |
| Enemies | Vex, Fallen |
| Boss | Thaviks, the Depraved (Marauder) |
| Description | Purge the Fallen infestation of the Exodus Black. |
Exodus Crash is a strike from the Red War.
Contents
Overview
Enemies Encountered
| Shields | |||
|---|---|---|---|
| Normal | - | - | - |
| Adept | |
- | - |
| Hero | - | |
|
| Legend | - | |
|
| Master | - | |
- |
| Grandmaster | - | |
- |
| Enemies | Champions | ||
| Fallen, Vex | | ||
| |
Boss
- Thaviks, the Depraved (Marauder)
Walkthrough
Prodromus Down
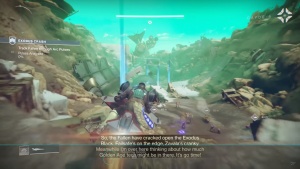
You begin the Strike at the northern extremity of Prodromus Down, near a cluster of three Pikes being guarded by enemies. Clear out the enemies and commandeer the Pikes, then move on to the first task of your team: follow a track of Arc Pulses in order to locate the Fallen tampering with the Exodus Black. While moving between the pulses, expect some Vex resistance, mixed in with the odd Fallen. If this is a variation of the Strike, the Vex Minotaurs and Goblins you will encounter might be replaced by Fallen Captains and Vandals.
Once all the pulses have been scouted, a group of Fallen will spawn up the road, near the ruined fuselage, that you will have to neutralize. Expect a mix of Vandals, Shanks, and a Major Captain. With them down, you will be clear to proceed forward.
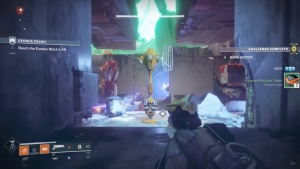
Once inside the ship's interior, keep fighting your way forward and eliminating all hostiles you encounter. Not long afterwards, you will come across a room with a weird yellow Fallen device. Clear your surroundings of any enemies, then send Ghost to download the data from this Fallen beacon and prepare to stand your ground. For the duration of the next encounter, try to stay close to the beacon. At first, you will have to deal with some Dregs and Overcharged Shanks, Exploder Shanks which have been modified to electrocute the ground underneath them with Arc energy. Make sure you drop the Shanks before they manage to electrocute the floor where you're standing and two more spots where additional foes will spawn. Afterwards, expect waves of Vex Goblins and Overcharged Shanks before two Ultra Servitors called Jamming Servitors appear to halt objective progress.
The two Servitors are sub-bosses for this Strike, so they are toughened up. They will be backed up by some Overcharge Shanks. Make the Servitors your priority targets, because they're likely protecting the Shanks from any damage. During the fight, some Goblins and Vandals will also spawn in, so try to remain in cover and keep blasting the Servitors. With them down, focus on the Shanks and then move on to whatever cannon fodder is still left. If you have to, you can use a Super and some grenades.
When the objective is nearly complete, a Hydra will spawn, accompanied by a couple of Minotaurs. Try to take care of the Hydra first and as quick as possible. If all three members of your team focus their fire on it, it should go down fairly quickly. Your goal is to do this before the group of Fanatics spawns in because you will have to make them a priority target once that happens. You want to kill them from a distance and before they have managed to swarm your position.
Wipe out whatever enemies are still left standing while Ghost completes the download. This will allow you access to the next part of the Strike.
Exodus Black
Once you enter Exodus Black, you will have some more Arc Pulses to investigate - feel free to pull out your Sparrow to complete this part faster. As Exodus Black is an open-world sector, the fireteam may encounter Public Events or Lost Sectors - these have nothing to do with the Strike, but may be completed for their usual rewards.
Once all six Arc Pulses have been investigated, head towards the Glade of Echoes.
Glade of Echoes
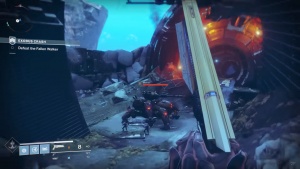
The objective in this area is to gain access to the next area by destroying an Assault Walker in the south end of the sector. On the way, you should come upon three Heavy Pikes which are meant to be used against the Walker (they disappear once the Walker is dead). These vehicles have two weapons: an explosive repeater, bound to the Fire function; and a bouncing Arc explosive, automatically released during strafing maneuvers (performed by rapidly double-tapping Left or Right).Attack it the same way you would any other Walker - cripple its legs until it falls and exposes its internals, then aim for the orange glowing portion of its body. Repeat this process until it drops for good. During this encounter, you can also expect some Shanks to be summoned in, but they shouldn't be too much of an issue. Attack from different angles to minimize the damage taken. Also, do not hesitate to take cover when necessary and stay mobile.
Next up, you need to push forward towards another Fallen Walker and a Giant Shank. On the way to them, you might encounter some light resistance, but you can ignore them if you want to. Reaching your destination, start by taking out the Shanks. Then, focus on the Walker. If you happen to have Pikes, use them and save your ammo and abilities for later.
Once the Walker is down, the shield barrier blocking progress will lower, allowing you to progress into EX-077 Command.
EX-077 Command
You're heading indoors again and you should prepare for a tough battle. If you're still riding some Pikes, now is the time to leave them behind and continue on foot. Once you reach the first chamber, you will be met by some Dregs, Wretches, and Vandals. There will also be some platforms that you will have to jump across. Deal with the enemies while carefully making your way forward. Keep climbing until you reach some gantry steps, then look for the orange lights above you that show the next platform you need to jump to. Keep moving and eliminating enemies, then rendezvous with your team at the entrance to the Boss chamber.
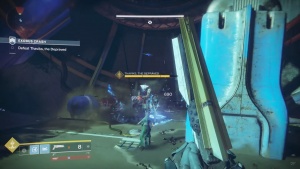
Once inside, you find a bunch of Overcharge Shanks - destroy them all to summon the boss, Thaviks, the Depraved. He is a significantly larger Marauder, which means that he can cloak, but his camouflage does not regenerate the same way. Look for his silhouette in the room and engage him. Have at least two players chip away at his health, while one deals with the cannon fodder around him.For the first part of this fight, Thaviks will attack from a distance. He will teleport out of the arena with every 10% of health lost. He will soon reappear near the Shank spawners with his cloaking ability recharged. Once a third of his health is gone, Thaviks will teleport away until Guardians clear the area of any lesser foes. Then, he will reappear near the entrance and assume the same strategy as before.
With another third of his health gone, he will once again disappear. After you clear the remaining enemies in your surroundings, he will come back. This time, he will not be attacking from a distance. Instead, the Boss will try to move in close, using the Overcharge Shanks he spawns to slow Guardians down. This phase would be the best for the use of Super Abilities if you have any available.
The Strike completes upon the death of Thaviks - a Fallen chest will appear which spews out the usual Strike rewards.
Notes
- Players sometimes have access to Fallen Pikes during this strike.
- A special version of this strike can be accessed while on the Relics of the Golden Age quest. It has to be started from a beacon and contains an extra enemy in the EX-077 Command, Kendriks-7, a Servitor which has to be destroyed for that quest step.
Reward
The Nightfall version of this strike has a chance to drop Impact Velocity.
| |
Impact Velocity |
| Sparrow |
References
- ↑ "Activity Enemy Information." Google Sheets, Created by Kimber Prime with the help of ReD_ReD_PaNdA, https://docs.google.com/spreadsheets/d/1tB87AL467rpjsIAe6PkMdVI3hHQ9rGFbcwQCDCACRZI. Accessed Nov 23 2021.
