The Inverted Spire
| The Inverted Spire | |
|---|---|
| |
| Information | |
| Location | Nessus |
| Players | 1-3 |
| Power | 1050 |
| Expansion | |
| Enemies | Vex, Cabal |
| Boss | Protheon, Modular Mind (Minotaur) |
| Description | End the Red Legion expedition that's ripped open the planet's surface. |
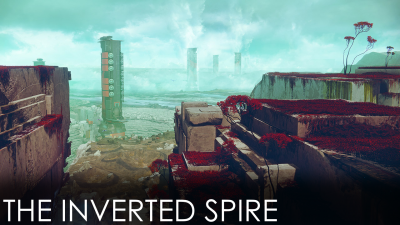
The Inverted Spire is a strike from the Red War.
Contents
Overview
Enemies Encountered
| Shields | |||
|---|---|---|---|
| Normal | - | - | - |
| Adept | |
|
|
| Hero | |
|
|
| Legend | |
|
|
| Master | |
|
|
| Grandmaster | |
|
|
| Enemies | Champions | ||
| Cabal, Vex | | ||
| |
Boss
- Protheon, Modular Mind (Minotaur)
Walkthrough
The Cistern
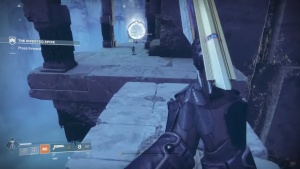
Once you're dropped within The Cistern, head to the southeast. You will come across some Cabal forces fighting some Vex. Eliminate them all, then interact with the marked conflux. This will make some floating platforms appear just ahead.
Navigate over the platforms, making sure to land safely on each one. At the end of this obstacle course, there will be a Vex cannon. Jump through it and it will send you flying through the air to another platform swarming with Vex or Cabal. Eliminate the hostiles and jump through the next cannon to land on another platform. Head inside the cave you will see before you and cross over into The Anchor.
The Anchor
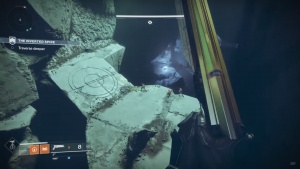
Once inside, go deeper down into the chasm. Keep in mind that The Anchor will be a Restricted Zone. There, you will have to traverse some more floating platforms. Watch your step, since falling off a platform means certain death.The platforms will be swarming with Vex forces with some Cabal Forces on the platform underneath. Look out for Hobgoblin snipers on the far end of this area, as well as some Goblins, Fanatics, and Hydras blocking the exit. On the right wall, there will be a plinth a bit higher up that could make a good sniper nest.
Once the area is clear, push forward into Excavation Site VII.
Excavation Site VII
You exit the chasm to find a new set of blocks that you need to jump between. You will also encounter some Cabal or Vex forces. This area is quite open, so be on the lookout for any snipers. Also, try to clear your next landing spot of enemies before jumping to it.
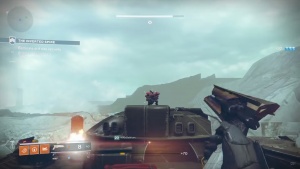
Navigate those platforms down (dealing with the heavy Cabal resistance on the way) until you reach a circular Vex altar - if you're lucky, there may be a Drake tank there for someone on the fireteam to use. There will be a handful of Goblins to drop there before you continue. Once they're down, just keep pushing forward towards the mining site, using a Sparrow (if you own one) to speed up travel toward the next major encounter. Avoid any fights between Vex and Cabal forces along the way. If you don't get involved in their fight, they will not attack you.
Once you reach the edge of the mining zone, slow down. There will be a couple of Major Legionaries to fight, as well as a plethora of other Cabal baddies, including a Colossus. Take out the Psions and Colossus first, then focus on dropping the two Major units one at a time. Have one player cover the group from lesser infantry units, while the other two target the Major unit. It will fall back to its little structure, but you can toss a few grenades in there for good measure and fire through any openings you see.
Once the two drill officers (the Major units) are dead, head over to either of two nearby Cabal catapults. You will be using that to board the mining drill. Have one teammate activate a catapult, while the other two deal with any remaining Cabal forces. Then, jump through the catapult. Remember to check its color. If it's not glowing orange, it will not have the power to propel you far enough and you will fall to your death instead.
Try to have your entire team land on the drill at approximately the same time, because the moment the first Guardian touches down, they will be attacked by Phalanxes and Legionaries. Try lobbing a grenade in the center of the group the moment they appear for maximum damage. Save your Supers for the battle to come, though.The moment you drop down to the command center, have a teammate interact with a terminal to begin realignment of the drill's catapult. Then, focus on staying alive and eliminating all enemies that will come to stop you. You will be attacked either a) by waves of Vex, including Minotaurs and at least one Hydra, or b) by waves of Red Legion units, including Gladiators and lots of War Beasts. Stick to cover, use all your offensive abilities, and make sure you stay alive. You don't have to kill all enemies in the area to advance, so when the catapult is in place, you're free to leave.
Once you land, be ready to tackle some Vex and Cabal enemies. Make sure you kill everything in sight and eliminate any snipers that might be lurking on the distant ledge to the right before you proceed. Then, jump down to the lower platform and use it to jump to the opposite side. You will be met by some more enemies, but the battle should be fairly straightforward, since there is plenty of cover you can use.
Keep moving and you will reach the massive drill. You will have to drop down to its rotating arms, but make sure they don't touch you or you will die. There are three safe paths you can use down there and they're marked by a dirt path, while the unsafe levels, where the arms can reach you, will feature a plain rocky floor. Once between the arms, move counter-clockwise and eliminate all enemies on the way. Make the snipers a priority target and do not jump. Jumping will put you into the reach of the drill arm above you.
If you're looking for a faster way across, you will have to do some pretty well-timed jumps around and over the drill arms, while ignoring all hostiles on the way, but this is not recommended. Alternately, you can instead speed through this section on Sparrow if you own one.
Rendezvous with your teammates in the entry corridor of The Inverted Spire.
The Inverted Spire
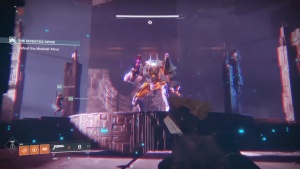
Make a controlled descent through the conduit and engage the group of Harpies that will be waiting for you. Mind the gap in the floor. Before you kill the last one, take cover and assume a defensive formation. Killing the last Harpy will spawn Protheon, Modular Mind, who will initially employ an explosive Void weapon similar to a Torch Hammer.When fighting Protheon, make sure to stick to cover and be quick on your feet. He will move around himself, so always be mindful of his position and find suitable cover. Designate one player to take care of the Harpies that will appear during the battle, while the other two focus their fire on Protheon's head.
Once a third of his health is gone, Protheon will assume a new strategy and teleport the floor away, dropping your fireteam to a lower platform. Make sure to jump right before landing to avoid fall damage. Protheon will respawn soon afterward, having switched to a rapid-fire Arc weapon.
During this stage of the fight, Protheon will occasionally smash its fist into the ground, causing the inner ring, then the outer ring, of the floor to become dangerously hot. There are several low circular pillars that you can use when this happens. However, they will offer you no cover. Alternatively, you can time your jumps and be caught mid-air when the floor is not safe, but this requires some more practice. Keep firing at Protheon's head for Precision Damage.
Once another third of Protheon's health is gone, the floor will vanish again. There will be some Goblins to deal with at the bottom of the region, and you want to do it fast before the boss has reappeared on this level. He will spawn in the lake just off the platform. That lake will be deadly for you, though, so stick to the relatively safe floor and keep shooting at the Modular Mind's head. Watch out for the Arc cannon attack that Protheon will employ in this phase - if it hits you, you will be slowed for a time, making you an easy target for its rapid-fire weapon.
Once there are about 50% of the last third of his health left, his head will explode and you will have to aim for the new opening on his torso. Also, he will go berserk and summon a horde of reinforcements, including many Fanatics. Deal with any Fanatics that spawn first, then wipe out the rest of the lesser foes before focusing on the boss again. If all goes well, shooting at Protheon's torso should bring him down quite quickly.
The Strike ends upon Protheon's death - a Vex chest will appear which spews out the Strike's rewards.
Notes
- This strike was available in the PC Beta of Destiny 2 prior to the game's full release.
- Protheon glows different colors during each phase of its battle, which correspond with the elemental type of its special attacks during the phases.
Reward
The Nightfall version of this strike has a chance to drop Trichromatica.

|
Trichromatica |
| Ghost Shell |
References
- ↑ "Activity Enemy Information." Google Sheets, Created by Kimber Prime with the help of ReD_ReD_PaNdA, https://docs.google.com/spreadsheets/d/1tB87AL467rpjsIAe6PkMdVI3hHQ9rGFbcwQCDCACRZI. Accessed Jul 20 2021.
