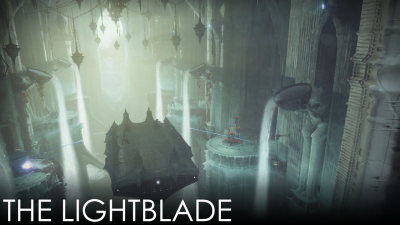
The Lightblade
| The Lightblade | |
|---|---|

| |
| Information | |
| Location | Savathûn's Throne World |
| Players | 1-3 |
| Power | 1430 |
| Expansion | |
| Enemies | Hive, Scorn |
| Boss | Alak-Hul, the Lightblade (Knight) |
| Description | Recover an artifact from a monument to Oryx, located deep in the swamps of Savathûn's throne world. |
The Lightblade is a strike introduced in The Witch Queen. Guided by Fynch, Guardians venture into a temple dedicated to Oryx within Savathûn's Throne World to retrieve a fragment of the Tablets of Ruin, guarded by the resurrected Hive Knight, Alak-Hul.
Contents
Overview
Enemies Encountered
| Shields | |||
|---|---|---|---|
| Normal | - | - | - |
| Adept | |
|
- |
| Hero | |
|
- |
| Legend | |
|
- |
| Master | |
|
- |
| Grandmaster | |
|
- |
| Enemies | Champions | ||
| Hive, Scorn | | ||
| |
This strike features Barrier Champions and Unstoppable Champions on higher difficulties. Enemies primarily utilize Arc and Solar shields.
Bosses
- Alak-Hul, the Lightblade (Knight)
Walkthrough
Queen's Bailey
Guardians arrive outside a large monument. Proceed forward into the Queen's Bailey area, defeating the initial groups of Hive. Alak-Hul, the Lightblade himself appears briefly near the entrance to the next room; dealing some damage will cause him to retreat temporarily. Clear the room of Hive, including Lucent Hive Lightbearers known as Lightblade's Warriors and Lightblade's Disciples. Remember to crush their Ghosts after defeating them. Once the area is clear, a path at the back opens.
Follow the corridors until reaching the Temple of the Navigator. Jump down and approach the docked Hive Ferry. Board the vessel to begin moving through the canals. As the ferry travels, Hive enemies, including Acolytes and Wizards, will attack from platforms on the sides. A Shrieker will also activate near the end of the first section.
The ferry will halt before a barrier. Ghost notes the blockage, and Fynch instructs the Guardians to lower it. Two Void charges are needed. Disembark and fight through Lucent Hive guarding staircases on the left and right to retrieve the charges. Deposit both charges into the receptacles near the front of the ferry to destroy the barrier and resume movement.
Continue along the canal, fighting off more Hive Wizards and Acolytes on the sides and Shriekers positioned on bridges overhead. Utilize the ferry's structure for cover. After passing through a waterfall, the ferry will stop again as numerous Thrall swarm the deck. Eliminate them quickly, after which Fynch confirms the ferry is moving again as it enters the swamp area before disappearing, dropping the Guardians into the muck below.
The Swamp
Upon landing in the swamp, Guardians will immediately be affected by the Weight of Darkness debuff, stacking up to x10, which severely limits movement speed and prevents sprinting, similar to a mechanic from the Crota's End Raid. Navigate through the murky swamp, following the faint lights. The area is filled with Scorn, primarily endless waves of explosive Screebs, alongside Raiders and other variants. Dangerous Lucent Moths will also seek out Guardians.
To manage the Weight of Darkness, stand near the large Hive lamps scattered throughout the path. These lamps temporarily remove the debuff stacks, but will explode after a short duration, potentially killing nearby Guardians and rendering the lamp unusable for others lagging behind. Proceed cautiously, clearing enemies, especially Screebs and Moths, and using the lamps strategically until reaching a cave system leading out of the swamp.
Fight through more Scorn, including an Unstoppable Abomination (on higher difficulties), within the cave. Emerge onto a ledge overlooking the entrance courtyard to the final monument. From this vantage point, take out the two Shriekers guarding the entrance below, as well as numerous Hive and Scorn enemies, including Blighted Gravekeeper Knights. Alak-Hul may appear briefly again. Once the area is clear, proceed towards the large doorway and drop down the hole inside to face the Lightblade.
The Lightblade
The final encounter takes place in a large, circular arena with a raised central platform and surrounding lower pathways and upper ledges providing cover. Alak-Hul spawns almost immediately and is highly aggressive, capable of closing distances quickly to perform devastating slams with his axe or firing powerful Arc projectiles.
The fight involves managing Alak-Hul while dealing with waves of Hive reinforcements. Alak-Hul has distinct health thresholds. Each time a third of his health is depleted (at 2/3 and 1/3 health remaining), he becomes immune, and a wave of powerful Lucent Hive (a Lightblade's Warrior and two Lightblade's Disciples) spawns. These must be defeated, and their Ghosts crushed, to make Alak-Hul vulnerable again.
After the first Lucent Hive wave is defeated, Barrier Knights (two at a time on higher difficulties) will begin spawning alongside regular Hive reinforcements. More Barrier Knights spawn when Alak-Hul reaches roughly 50% health, and a final pair spawns partway through his last health segment.
Key strategies involve constant movement to avoid Alak-Hul's attacks, utilizing the arena's cover, and focusing fire on priority targets like Lucent Hive and Champions. Kiting Alak-Hul around the arena while teammates clear adds or deal damage is effective. One player can often draw his aggro by jumping between the central platform and the upper ledges while the others manage enemies and damage the boss when vulnerable. Prioritize crushing Lucent Hive Ghosts quickly to prevent revives. Once Alak-Hul's health is fully depleted, the encounter ends. In the Story Mission version, Guardians retrieve the Tablet of Ruin fragment from an altar.
References