The Arms Dealer
| The Arms Dealer | |
|---|---|

| |
| Information | |
| Location | European Dead Zone |
| Players | 1-3 |
| Power | 1050 |
| Expansion | |
| Enemies | Cabal, Fallen |
| Boss | Bracus Zahn (Legionary) |
| Description | Shut down the operations of an ironmonger providing weapons to the Red Legion. |
The Arms Dealer is a strike from the Red War.
Contents
[hide]Overview
Enemies Encountered
| Shields | |||
|---|---|---|---|
| Normal | - | - | - |
| Adept | |
|
- |
| Hero | |
|
|
| Legend | |
|
|
| Master | |
|
|
| Grandmaster | |
|
|
| Enemies | Champions | ||
| Cabal, Fallen[notes 1] | | ||
| |
Boss
- Bracus Zahn (Legionary)
Walkthrough
Legion's Anchor
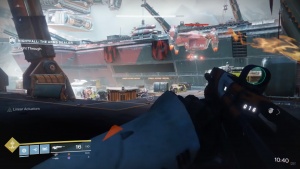
Once the Strike starts at the northeast entrance of Legion's Anchor, make your way through the corridor before you. If this is a variation of the Strike, expect some Fallen in this area. Otherwise, fight your way through the Cabal you will find there.
Make sure to employ the yellow explosive canisters to quickly secure the area, then access the marked terminal to open the door towards the south cargo docks.
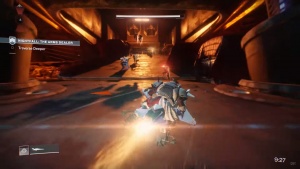
On the other side of the doorway, a dropship will deploy some Cabal forces. If this is a variation, a battle between them and the Fallen will begin. The Cabal are led by the first sub-boss of the Strike - an Illicit Slug Shooter Legionary which had fired off the flare calling in reinforcements. Make him a priority target and just shoot him in the head until he falls. Then, mop up the cannon fodder.
At this point a ship will come in and airlift a tank that was blocking access to a Solar fuel cell. After the tank is gone, have a teammate grab a fusion ball from the marked area, then rush forward. Make sure the two remaining members of the fireteam provide covering fire for the ball carrier, as they push forward as quickly as possible and drop the fusion ball at the marked location.
As you make your way forward, one of the three Unsanctioned Blasters (Legionary), will be waiting for you, as well as a significant Cabal force. If possible, ignore them until the fusion ball is deposited, then engage the enemies and wipe them out.
Once the Cabal shield barrier has been lowered, expect to be attacked by a Cabal Thresher, as well as an Exiled Launcher (Legionary) from the northern ramp. If this is a variation, Fallen Servitors will also join the fray. Deal with each threat as it presents itself, but focus on the Legionary sub-boss and the Cabal attack ship first. Then, clear the area of any lesser foes.
Once done, head for the windowed corridor and into the next loading bay. You will have the high ground as you enter, so stick to it and clear the area from a distance. Employ the yellow explosive canisters when you see enemies around them. Then, move towards the Sunken Isles.
Sunken Isles
Once inside the next area, you want to fight your way out of the cargo bay and up to the carrier ramp. If you are lucky, Hawthorne might have dropped a Drake tank for you to use. If not, you will have to fight the significant Cabal force, including an Outlawed Sniper (Legionary), guarding the area on foot.If you are in a tank, head up the ramp, blasting whatever enemies you see, and head into the carrier ship. As you make your way there, cover your fireteam from Threshers, as they use the tank as cover and stay back before using their Sparrows to catch up with you. If available, the Drake should be used to do the heavy lifting.
If no tank is available, methodically chip away at the Threshers' health by sticking to cover. While doing so, watch your sides for any cannon fodder that might try to flank you. If you are on foot, however, do not split up while proceeding forward.
The ultimate goal for this area is to reach its end together and be safe from any enemies.
Alternately, if everyone on the fireteam has a Sparrow, this section can be rushed through on Sparrows. When taking this alternative, the most dangerous units are the Illicit Slug Shooter and an Honored Colossus - use the Sparrow's dodge ability (triggered by double-tapping Left or Right movement inputs) judiciously when avoiding their attacks lest you get caught without enough boost for another dodge.
Echion Hold
Moving forward and into Echion Hold, you will have a significant threat to deal with - a Goliath tank. If you have a tank of your own, it will be far easier to take this foe down. If not, however, you will have a tough fight on your hands. Deal with the tank however you see fit and take out the regular infantry around you while looking for the elevator controls. Two switches, one near the entrance and one in the opposite corner from the entrance, must be flipped in order to lower the elevator.Once the large platform descends, it will come down carrying one more Goliath, as well as the second Unsanctioned Blaster. If you have a Drake, focus its firepower on the Goliath and the Major unit. If not, stick to cover, stay mobile and pepper them both with your Kinetics until the way is clear. Consider using grenade and rocket launchers against the tank. If a pack of War Beasts spawns with the Unsanctioned Blaster, deal with them first. This way, they will not be able to compromise your position and flush you out of cover.
You might want to use a Super on the last bits of the Goliath's health. That way, the Super can be used to destroy the Goliath and inflict some serious damage on the Unsanctioned Blaster if it is timed well.
Firebase Airfield
Head up the ramp after you clear the previous area and you will arrive at a door blocking the way to Firebase Airfield. Wait for Ghost to hack the door controls, then make your way through the hangar and a couple of platform bridges. Look out for the Volcanic Scorpius units and take them out first before you deal with other foes. Note that the Fallen might join the battle, dropping Vandals and Servitors. Don't rush it and fight your way forward, methodically eliminating everything in the way, including the third Unsanctioned Blaster and the second Exiled Launcher.
At this point, try to save your abilities for the final battle.
As Bracus Zahn makes an appearance, he will arrive with a couple of Centurions. Take them out first. If the entire fireteam focuses their fire at one Centurion at a time, both of them will fall in a matter of seconds. Then, Zahn will retreat and you will have to fight your way to a cargo elevator and up from it.
If you find clearing this hangar tough, split up and attack from several angles. This way, one of your teammates will soak up the majority of the damage (preferably a Titan tank), while the rest distribute the hurt between enemies.
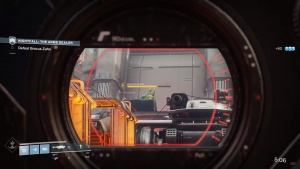
Once at the elevator, a nearby switch must be flipped in order to activate the elevator, which will start ascending once all nearby enemies are dead. During the ascent, after dealing with another squad of Red Legion units arriving via drop pod, Bracus Zahn will stand on the edge and take potshots at you with his sniper rifle. Immediately take cover and do not bother shooting back.
Bracus Zahn
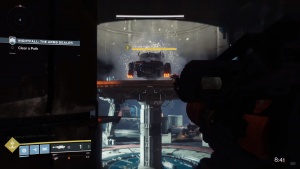
The moment the elevator reaches its destination, scatter and immediately locate and eliminate the Volcanic Scorpius units. Then, focus all firepower available on Zahn's head to quickly bring a third of his health down.With two-thirds of his health left, Zahn will retreat to a tower, then fire off a flare and trigger an impenetrable shield. Deal with the regular Cabal that will assault your position and as soon as a fusion core presents itself, grab it and deposit it at the marked location to lower Zahn's defensive barrier.
He will fly down and summon some more Volcanic Scorpius units, as well as a significant pack of War Beasts. Try to ignore those unless they're causing you problems and focus on shooting Zahn in the head. Have your toughest Guardian draw his fire, because his sniper rifle is brutal and you don't want it to hit a weaker player. At this point, you would do well to unleash a Super on Zahn's head. Once another third of his health is gone, the boss will retreat to the other tower in the airfield. As soon as he does so, retreat as far as possible from him, so you can avoid the sniper rifle.
Once the platform's shield deploys, another fusion core will be revealed as a Cabal ship airlifts another tank blocking access. Like before, grab a core and take it to the marked location to destroy the shield and force Zahn back down for the final phase of the fight.
During the third stage of this battle, Zahn will ditch the long-range weapon and opt for a much deadlier shotgun instead, similar to those often used by Legionaries. You are not safe on the ground anymore, as his projectiles will bounce and they deal significant damage. Employ whatever cover you can find and use some precise jumping maneuvers to dodge his attacks and gain a height advantage on him.
Use every last offensive ability you might have available to bring him down as fast as possible. Once Zahn dies, the cannon fodder will disappear and the Strike will be completed. Go to the nearby chest and collect your reward.
Timewarp: Anomaly Locations
Prior to version 1.1.3, completing a Nightfall version of this strike with the Prism and Timewarp: Anomalies Modifiers was required to obtain the Legend of Acrius Exotic Weapon. The anomalies spawned by Timewarp: Anomalies always appeared in a specific set of locations, given below:
Reward
The Nightfall version of this strike has a chance to drop Tilt Fuse.
| |
Tilt Fuse |
| Sparrow |
Notes
References
- Jump up ↑ "Activity Enemy Information." Google Sheets, Created by Kimber Prime with the help of ReD_ReD_PaNdA, https://docs.google.com/spreadsheets/d/1tB87AL467rpjsIAe6PkMdVI3hHQ9rGFbcwQCDCACRZI. Accessed Jul 20 2021.
