The Pyramidion
| |
This page describes content which is not available in the game. |
|---|---|
| "The Pyramidion" was moved into the Destiny Content Vault in |
| The Pyramidion | |
|---|---|

| |
| Information | |
| Location | Io |
| Players | 1-3 |
| Power | 750 |
| Expansion | |
| Enemies | Vex, Taken |
| Boss | Brakion, Genesis Mind (Hobgoblin) |
| Description | Seek vengeance against the Vex Mind that corrupted Asher's arm. |
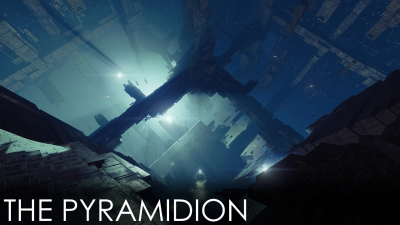
The Pyramidion is a strike located on Io.
Contents
Overview
Enemies Encountered
Boss
- Brakion, Genesis Mind (Hobgoblin)
Walkthrough
The Rupture
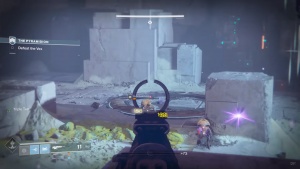
You begin the Strike in The Rupture - head for the Pyramidion's entrance, preferably on Sparrow.You will be met by Goblins and Harpies on site. Send your designated tank in the central sunken area to inflict the majority of the damage, while the other two players stay on the perimeter and engage from a distance. While the tank fights up close, make sure that the rest of the fireteam looks out for Hobgoblins and drops them as soon as they appear.
When the enemy lines are thinned out, stand in the altars of light to unlock the door. There will be two altars, so send a player to each one to open the entrance faster. Once the door opens, eliminate any remaining Vex forces and descend into the Pyramidion.
Pyramidion
Once inside, keep following the path downward. You will encounter Taken or Vex as your first enemies inside the structure.
As you descend the numerous platforms, make sure your toughest player goes in close, while the other two provide covering fire from the platform above. Once a platform is clear, all three of you should move a step down and repeat the same process.
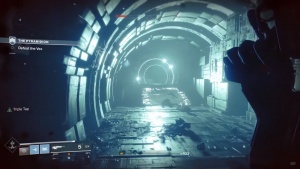
Next up, you will have to deal with some laser traps. The first three are easy enough. After that, you will have a laser floor and a laser wall to jump over. Then, slide under the second laser wall and drop down the shaft, while controlling your position carefully to avoid the next three laser traps.
Once you go through the laser traps, you will arrive a pretty large open space full of enemies. On the other side of this area, there will be a ribcage-like structure that holds the first warpgate. Fight your way forward towards it, but don't be too aggressive or you might end up overwhelmed by the enemies. Stay mobile and use the available cover to isolate as many enemies as you can while you deal with a smaller group. When you've cleared the area, the warpgate will open.
Go through the warpgate and you will be presented with some more laser traps. Navigate those carefully, timing your movements, as they will disappear and reappear at regular intervals.
Moving on, you will have a horde of enemies to deal with and three light altars to activate. Make sure you deal with the majority of the enemy forces first, making any snipers present your main target. Once the area is relatively clear of foes, send two players to activate the first altar. Once an altar is activated, reinforcements will arrive, so just repeat this process for the remaining two.
Make sure you save at least one Super for when the third altar is activated because a Hydra will spawn once all three are active. Deal with the Hydra and whatever other enemies remain, then go through the second warpgate.
You will be met by some moving laser traps. Time your movements carefully and dodge them. After going through some of the traps, you will have to deal with a small group of enemies before having to dodge four more rotating laser traps in a circular corridor. On the other end of the corridor, you will find the third warpgate.
Once you go through the warpgate, your objective will update and you will have to hack four network towers. There will be plenty of enemies to battle while you do it too. In the Vex variant, be mindful of two Cyclops units on the far end of this area, as well as some Hobgoblins on the upper platforms. Make those your priority target, then focus on any Minotaurs in the area.
It's recommended to stick together, with the entire fireteam attacking one network tower. Then, as one of you hacks the tower, the other two should focus on securing the area and clearing a path towards the next nearest tower. When all four have been hacked (one of them is on the lower level of this area), move through the final warp gate after dispatching of a Major Hydra or Taken Centurion, depending on the variant.
Brakion, Genesis Mind
After passing through the final warp gate, you will behold what appears to the untrained eye to be a pit. Drop down after eliminating any foes around it (alternatively, you can just leave them alone and jump down - the Goblins stationed here will not become aggressive unless they are attacked). Now, it's time for a boss battle. Luckily, you will have control over when it starts, so take your time and prepare accordingly.
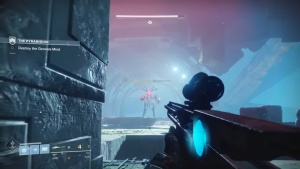
When you're ready, stand on the light altar next to a large Vex gate to summon Brakion, Genesis Mind, then focus all of your fire on its head once it lowers its weapon. Stick to cover and don't be afraid to use your grenades. Once you deal some damage to the boss, it will retreat to another location and summon a white shield that your bullets are worthless against.
When the white shield goes up, a group of goblins will spawn. Deal with those and stand on the marked altar to activate it. There will be a total of two altars that you need to repeat this with before the Genesis Mind's shield drops. Note that Brakion is still able to hit you with its Line Rifle and Void flame bolts while shielded, so take cover as needed to avert an early death. Once the shield drops, focus all fire on its head once more, aiming for the red light in the middle.
When it warps away to another corner of the arena, it will deploy the shield wall a second time. Like before, stand on the light altars to bring it down, but watch out for the Minotaurs that now spawn along with the Goblins.
After the shield has been brought down a second time, Brakion will warp back to the Vex gate, then warp to the center of the arena and start moving around. So, make sure you stick to cover and always be aware of its position. Keep moving, keep your head down, and keep focusing your fire on its head. Also, keep in mind that the low blocks that you will use for cover can disappear and rearrange, so be ready to change your position at all times.
At this point, you should watch your ammo. Running low on ammunition will send you running around the area and out of cover, so make every shot count. It's advised to have your fireteam split up and attacking from three different directions.
With another third of its health gone, the boss will become even more aggressive. Just stick to cover and you should be okay, but keep in mind that more powerful reinforcements will also start spawning. Deal with them as quickly as you can, then keep shooting at the Genesis Mind's head. Once its head blows up, focus your fire on the white glowing portion of its torso. Sticky grenades and Supers can be extra helpful here in order to quickly end this extra-deadly final phase (though the boss's predictive aiming worsens enough to allow for effective rapid left-right-left-right strafe-dodging at range, it now fires its Line Rifle four times in a row rather than just once).
Once Brakion drops for good, you're free to collect your hard-earned loot from the Vex chest that appears.
Notes
- If Brakion's head is destroyed before it goes immune, it will move around the stage instead of staying behind the shield, remaining immune until the shield is lowered.
Reward
The Nightfall version of this strike has a chance to drop Silicon Neuroma.
| |
|
| |


