Scourge of the Past
| Scourge of the Past | |
|---|---|

| |
| Information | |
| Location | Earth |
| Players | 6 |
| Recommended Power | 750 |
| Enemies | Fallen |
| Boss | Insurrection Prime, Kell's Scourge |
| Expansion | Forsaken |
| Description | Beneath the ruins of the Last City lies the Black Armory's most precious vault, now under siege by Siviks and his crew, the Kell's Scourge. |
Scourge of the Past is a Raid added in Season of the Forge.
Preparation
For the second encounter of the raid, it would be helpful to use a Sparrow with the Transmat Preloader perk or a Ghost Shell with the Speed Demon perk.
The third encounter features enemies with Arc, Solar and Void shields, so the players tasked with defeating those should have weapons that deal appropriate elemental damage. Machine Guns are a decent option.
One viable strategy consists of three Warlocks running Well of Radiance and a Titan with the Ward of Dawn for the last encounter of the raid. Hunters might want to use the Golden Gun in the Way of the Sharpshooter, with Celestial Nighthawk. It is recommended to have a couple of players use Legendary Sniper Rifles to remove the boss' shields and interrupt its casts effectively.
Berserker
Objective
Fight through the Kell's Scourge forces and gain access to the sewers.
Strategy
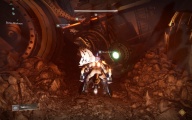
The team is transmatted into the Botza District of the Last City. At the building in the center of the district, there is a Berserker (Fallen Captain) enemy and several contraptions, one of which shows a yellow and red dial, the other has a circular hole in it which acts as the receptacle. The encounter begins after this Berserker is killed and the battery it drops is deposited into this receptacle.

A Berserker is covered by a shield that makes it immune to all damage. Once in a while it expands the shield, creating a small suppression field around it, and exposing two weak spots on its chest and back. The players have to enter the suppression field and destroy both glowing spots simultaneously by shooting them to remove the shield and be able to kill the Berserker. A battery will drop upon killing the Berserker.
Once the battery is deposited, the holomap will activate. It shows the players as yellow circles, Berserkers as red triangles, and energy stations as green squares—which are distinguished by the amount of little dots above them. The map energy station is marked with 5 dots, denoting as energy station 5. Energy station 1 is on the north, in front of the Schnell building, which serves as the main landmark in this encounter. Station 2 is on east, station 3 is on south, and station 4 is on west. Energy stations 1-4 each have a receptacle and a blue dome.
At least one of the players has to remain and study the map to guide the other players through this encounter. A single Berserker will be marked on the map with a red circle above their triangle, indicating that it has two batteries; the map reader has to guide the rest of the group to it. When it is killed and a player picks up a battery, their circle on the map is marked with a certain amount of dots, which show where the battery they are carrying has to be deposited. For example, the player marked with 1 dot has to bring their battery to Schnell, and the player marked with 5 dots has to deposit their battery into the holomap receptacle. Any other Berserker not marked by the circle will instead drop a battery for station 5.
The battery expires in a fatal explosion exactly 1 minute after drop from a Berserker, so the players carrying them should move quickly. When someone takes a battery, they get the Ionized debuff which prevents them from picking up a battery again for two minutes. The person with the battery cannot fight, so their teammates have to protect them. When the battery carrier approaches a station, a couple of Servitors spawn, blocking the receptacle until they are defeated. Depositing a battery into the wrong station will kill every player nearby.
The Servitor at station 5 will additionally disable the holomap. The holomap has a battery life meter measured in 10 increments, a new battery will charge 3 parts. Failing to charge the holomap will wipe the fireteam.
Once the stations are charged 4 times, the encounter will end and the domes will disappear, allowing the players to descend into the sewers, claim their reward, and proceed to the next encounter.
Notes
- It would be a good idea to visit all of the energy stations before starting the encounter, and scout the shortest routes to them to be able to deliver the batteries on time.
- Players can use Sparrows during this encounter. A person with the battery is unable to summon one, but they can jump onto another player's vehicle and be carried by them.
- The map reader has no way to tell one player from another on the map, so one person has to pick up a battery, receive their instructions, and only then another one can take the second battery.
- There are several Berserkers present in the area, only one at a time carries the required batteries. The map reader does not know which player has found the right enemy, the best they can say is how many players are close to it.
- One of the batteries from the pair always has to be delivered to the map, so if one of the carriers got sent to a station 1-4, the other can pick up their battery and run straight to the map.
- If all of the players that have to run batteries are Ionized, one can switch places with the map reader. Alternatively, a couple of players can die to lose the debuff and be revived to carry the next set of batteries.
The Black Armory Vault
Objective
Enter the sewers and search for the Black Armory vault.
Strategy
The players will appear in a maze, which they have to navigate to a large circular hole in the ground, and then through tunnels to a door with two panels on either side. The starting point of the maze depends on where the players descend.
If the group jumps down into the tunnel at station 1, the Schnell, they will appear in a tunnel near a cave entrance. The players have to turn so that the cave entrance is on their left side and move forward, skipping two tunnel entrances and turn left into the third one. Then the group has to move forward and over a gap at a certain point, entering the leftmost tunnel in that room. After the gap the players have to take the first left turn, skip two blocked tunnels on their left and then turn left again.
The path from station 2 might be the longest one. The group has to move forward and take the first right turn, then turn left twice, and to the gap. The players have to go into the rightmost tunnel in the gap room, then forward until they hit a wall and turn right. They have to skip two intersections and turn right on the third one, then turn right again, skip two blocked tunnels on their left and then turn left.
Starting from station 3 the group has to turn right, then left, skip an intersection and turn right on the next one. Then they need to turn right again, skip two blocked tunnels on their left and then turn left.
From the station 4 starting point, the players have to move forward, turn right, then turn left twice and enter a cave. In the cave they have to turn right, and go left as they exit it back into the tunnels. The group has to skip four tunnels, the latter two of which are blocked, then turn left.
ESCAPE!
Objective
Escape the flaming Servitor, Ablazed Glory.
Strategy
The encounter starts when two players simultaneously melee both panels on either side of the door. It will open, revealing a giant flaming Servitor that will chase down the players. It is immune to damage and immediately kills Guardians it approaches.
The group has to escape from it into the other door that opened at the same time, push 8 buttons hidden in the tunnels to open the door at the end of the encounter and climb the platforms up into a cave that leads to the next encounter. The players can and have to use Sparrows during their escape. Buttons do not have to be interacted with, a single player just has to linger close to one until it beeps and its light changes from red to green.
Button 1 can be found immediately at the beginning, on the bottom path. Button 2 is on the top path directly after the second spinning wall, and button 3 is right below it. Button 4 is in the large cave with some debris, on the left side. Button 5 is in the same cave, on the right side. Buttons 6 and 7 are to the left and right of the bridge across a gap. Button 8 is to the right of the second bridge across a gap.
After entering the cave and exiting it into the spacious room with large pillars, the players have to climb those pillars to move across to the other side and into a hole near the ceiling on one of the walls, then through some caves and debris into a ruined part of the City.
Images
Button 1

Button 2

Button 3

Button 4
Button 5
Buttons 6 and 7

Button 8


Notes
- The players should keep a distance between them and avoid colliding into each other.
- There is what appears to be chains or barbed wire in some places in the tunnels. It is an actual object the players can collide with.
- If all players know where the buttons are and can push them, one can be sent forward to reach the end as fast as possible, while the rest of the team opens the door for them.
Vault Access
Objective
Gain access to Vault Ebisu by whatever means necessary.
Strategy
For this phase, you'll want to split your Fireteam into 3 smaller teams. Team A (2 members) will stay on ground level, while team B and C should go underground. Team A will focus on clearing out the enemies that will try to access the underground level. This includes fighting off Shanks that will be shielded by Void, Solar, and Arc elements. You will need to use different elemental weapons to take them down quickly.
There is a wandering Servitor that must be slain to disable the electric shields blocking the underground entrances. Once inside, team B and C should split and look for consoles that need to be meleed by one player. They will grant one of 4 buffs: pink (Continuous), blue (Angular), white (Parallel), and red; the red one will wipe out the whole fireteam, so it must not be taken. Players with a buff will have an area marked around them which will cause them to Tether and deal damage to each other if another buffed player enters the area. Team B and C should both rotate clockwise to avoid buff contact, the players space out evenly across the roundabout. When the first set of buffs have been taken, team A needs to kill another Servitor that has spawned so that the consoles will reset with more buffs. A buffed player is killed if they take a different buff. After the team gathers the two sets of buffs, they should contact team A, who needs to destroy another Servitor to open the path back to the surface.
Team B and C now need to find 3 tank spawns, located at the bottom left, bottom right, and at the top of the map. They will spawn upon depositing the buffs into the receptacles, and will be your main weapon against Insurrection Prime who is seated in the middle. He will try to destroy the tanks by firing aerial strikes, so be mobile at all times. Eventually, you will need to exit from the tank, as the HP will go critical, indicating that it is about to explode. During this time Team A should unite with remaining members from B and C and go underground to collect their buffs, while other teammates attack boss and Servitors. Keep rotating like this and you will finish the first phase in no time.
Notes
- The last two encounters will take place in the same open arena. exploring the layout will be good knowledge for the boss encounter.
- Tanks have missiles that will deal devastating damage if used simultaneously.
INSURRECTION PRIME
Objective
Destroy INSURRECTION PRIME.
Strategy
A few Marauders and a Berserker will spawn outside the entry building. To begin the encounter, the Berserker must be slain and the battery deposited into the receptacle inside the building. Similar to the first encounter, this will trigger a holomap which will tell you where to find other Berserkers and deposit the next batteries. 2 players should stay next to it, one for reading the map, and another that will serve the role of a sniper.
Insurrection Prime will spawn in, the sniper's goal is to destroy 6 shield generators protecting Insurrection Prime mech in immunity. They are found on his shoulders, back, waist, and knees. Insurrection Prime will occasionally issue an attack that can be disrupted by destroying a weak spot that appears.
The remaining 4 members should split into 2 smaller teams, eliminate Berserkers and collect batteries. The first one will drop 2 batteries, both of which need to be deposited 1 at a time on plates that summon tanks. You will need to kill 2 of them. Tanks will spawn simultaneously once you deposit all 4 batteries, so your Fireteam should be spread out and be ready to grab the tanks.
When Insurrection Prime's shield goes down, his stomach will open and expose the Servitor for damage phase. After some time, the boss will emit an EMP blast which will give each teammate one of the following charges: Angular, Parallel, or Continuous. The goal now is to group up with a player that has the same charge, which will drastically enhance your damage. At the same time, you want to avoid other teammates of different charge, as a boss will continue using EMT blast, which will now be deadly. Well of Radiance will serve you really well at this point. If you have Hunter, he should use a Golden Gun in the Way of the Sharpshooter to produce a ton of orbs, so your Well is always charged up for the damage phase.
Notes
- Clean out all of the Marauders before engaging Berserkers, as they can kill you easily if you are focusing on Berserker.
- Due to the size of the map, your Fireteam should use close and medium-range weapons like shotguns, hand cannons, and pulse rifles.
- During the fight, Fallen snipers that deal massive damage will be spawning on top of the buildings. Kill them immediately.
Loot


| Raids |
|---|
| Last Wish • Garden of Salvation • Deep Stone Crypt • Vault of Glass • Vow of the Disciple • King's Fall • Root of Nightmares • Crota's End • Salvation's Edge |
Leviathan • Eater of Worlds • Spire of Stars • Scourge of the Past • Crown of Sorrow |