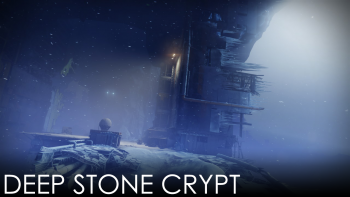
Deep Stone Crypt
| Deep Stone Crypt | |
|---|---|
| |
| Information | |
| Location | Europa |
| Players | 6 |
| Recommended Power | 1350 |
| Enemies | Fallen |
| Boss | Atraks-1, Fallen Exo Taniks, the Abomination |
| Expansion | Beyond Light |
| Description | "The chains of legacy must be broken." |
Deep Stone Crypt is a raid added in Beyond Light.
Augments
The Augment mechanic is used throughout the whole raid.
- Augment
- An augment is a buff that can be carried by an entity, and remains on the ground for a few seconds after the user is slain. There can exist no more than one copy of each augment type, another enemy will spawn with an augment should one be lost. A guardian can carry only one augment at a time, and the Augment Lockout debuff (45s) will negate the effects of the user's augment.
- Terminal
- Augments can be safely stored and retrieved by guardians through a terminal, all terminals in a single encounter have a shared storage. Terminals are disabled while a Sentinel Servitor remains alive.
Types
Certain items have greater function and visibility to the player while under the effect of an augment, otherwise the items are completely inconspicuous.
- Operator
- Operator can see and interact with special targets by shooting them. An active panel will be marked with a glowing red grid.
- Scanner
- Scanner can see certain items marked with a glowing yellow grid, which indicate important locations to progress the encounter.
- Suppressor
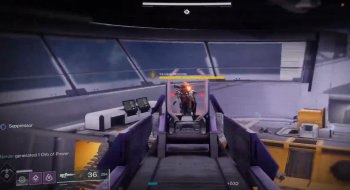
- Suppressor can see and interact with certain targets by standing close and shooting them. There are sets of orbs floating around each of the places where Taniks can be stunned. When an orb becomes active, it will be marked with a glowing blue grid and have a perimeter to stand in. While the Suppressor is under an active orb, they will see another glowing target that must be damaged (1-2 shots) to discharge the orb. Upon stunning Taniks, one augment user will receive the Augment Lockout debuff.
Desolation
Objective
Locate the Deep Stone Crypt.
Description
The fireteam is transmatted to Eventide Ruins. In front of the landing zone there is a building with Fallen enemies, including a couple of Ultra Captains with Void shields. Defeating all enemies unlocks a hatch into a tunnel. The tunnel ends at a door which leads to the Desolation area.
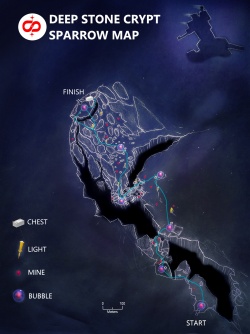
In this area, players periodically gain up to 10 stacks of the Frostbite debuff, which results in death. The stacks can be reduced to 0 by standing in heat bubbles, which provide the Shelter from the Storm buff. This buff does not allow players to gain Frostbite, but it is removed upon leaving a bubble.
The first heat bubble is located right outside the door. It contains six Fallen Pikes which can be used to travel in this area, but Sparrows also work. The blizzard reduces visibility, but players can navigate from one bubble to another by using web mines and lights as landmarks. The mines respawn after exploding. Each heat bubble except for the first one contains a device which teleports players interacting with it to the previous heat bubble. A group of Fallen arrives to protect each heat bubble except for the first two. The last bubble is also protected by two Brigs.
The final bubble is located right by the door leading into the next zone. The tunnel and open area beyond it have no blizzard and do not apply Frostbite. There is also a hidden chest near the final heat bubble, located in the cliffs to the right when facing the door.
Crypt Security

Objective
Disable Crypt Security.
Description
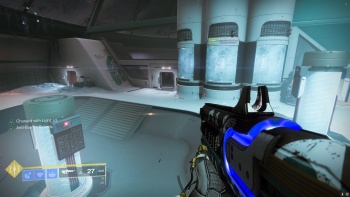
The room is divided by a wall into two halves: light and dark, with doors connecting both sides. There is also a corridor on the farthest side of the main room that is closed off by doors that can be unlocked by Operator panels on each side. Within the corridor is another one-way Operator door leading down to the basement, which can open when there is only one guardian in the corridor. The area contains three terminals placed in light, dark, and the basement. There are three big white fuses on each side, they have to be destroyed for the encounter to end, but they are shielded from all damage.
The terminal is loaded with the Operator augment, which beings the encounter upon retrieval. The doors in the wall close shut, preventing access to the other half of the room. Fallen enemies spawn on each side, including ![]() Overload Champions. One of the Vandals on the dark side carries the Scanner augment. Sentinel Servitors spawn in the main room at certain points throughout the encounter and Marauders spawn in the basement. Defeating a Servitor too quickly causes another one to spawn in the other room.
Overload Champions. One of the Vandals on the dark side carries the Scanner augment. Sentinel Servitors spawn in the main room at certain points throughout the encounter and Marauders spawn in the basement. Defeating a Servitor too quickly causes another one to spawn in the other room.
The Operator can temporarily remove the shields from the fuses by shooting the correct panels in the basement. There are ten panels in total, five under each half of the main room, but the Operator has to shoot only two on each half (for a total four panels). The Scanner can see the correct panels from above through skylights in the floor, and so must direct the Operator to shoot the marked panels. Shooting a wrong panel lights the basement on fire and kills the Operator. If a Guardian spends more than one minute in the basement, the fire starts anyway. Taking too much time to remove the shields causes a wipe.
Upon triggering the correct panels, the fuses will be opened and thus damage phase begins (40s). The six fuses have to be destroyed in a certain order, shooting a wrong one will cause a wipe. There are six lamps in the basement's ceiling behind the terminal, each corresponding to a fuse. The guardian in the basement must wield the Scanner augment to see the marked lamps and reveal the correct fuse to damage. Once a fuse is destroyed, the next lamp begins to glow. After the damage phase ends, the new Operator has to free the guardian in the basement before they are incinerated.
Red Rover
The Security challenge is completed if every member of the full raid team shoots two correct panels as the Operator, over three damage phases. If an Operator dies to the fire in the basement, the challenge fails.
Notes
- The outer doors in the corridor will automatically open when a guardian is standing by inside.
- During damage phase, the doors in the wall will automatically open.
- There are no panels on inside of the basement doors, meaning that the basement can only open one-way in.
- The active fuses have meters below the shields that fill to indicate the remaining time to damage them before closing shut.
-
 Arc Soul will fire at fuses, it may hit an incorrect fuse.
Atraks-1, Fallen Exo
Objective
Defeat Atraks-1.
Description
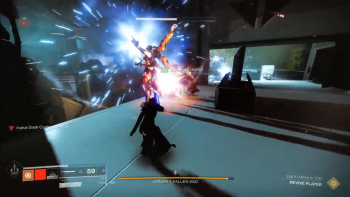
The Atraks-1 boss fight takes place both in the Deep Stone Crypt and on the Morning Star space station. Players can travel between these areas by using four elevators on the farthest wall on the Crypt side, which arrive once the encounter begins. Both areas can be divided into three sides: left, middle, and right; and each area has a top and a bottom floor. There are four augment terminals in the Crypt: two on the left side on both floors, one in the middle on the bottom floor, one on the right on the top floor. There are four terminals on the Morning Star: one on the left side on the top floor, one on the right side on the top floor, and two in the middle on the bottom floor, one is closer to the elevators, the other is closer to the windows.
The encounter begins when someone touches the glowing orb by the elevators. Doing so spawns eight copies of Atraks-1, four in each area. In the Crypt, there will be one boss on the right side, one in the middle, where the orb used to be, and two on the left side. On the Morning Star, there will be one boss on the left side, one on the right side, and two in the middle. All of the copies are immune to damage. The Operator augment is then carried by a Vandal in the Crypt, it should be picked up by or sent to the team's designated Operator, who will use it on the Morning Star. Six Sentinel Servitors will spawn eventually, one on each side of both areas, and a Vandal will appear with the Scanner augment on the Morning Star.
After 90 seconds pass, or once all Servitors are defeated, the damage phase begins. All copies of Atraks-1 on the Morning Star begin to cast Replicated Ruin, which kills the fireteam if successful. If it is not, the four bosses in the Crypt will try to use this ability next, then the four back on the space station try to cast it again, followed by the Crypt's four, after which the damage phase ends. The fireteam has barely enough time between the casts to run back and forth between both areas. Players can also split up, with one half of the team staying on the Space Station, and the other half staying in the Crypt, passing the Scanner augment to the team that is currently dealing with the cast.
Replicated Ruin is interrupted by damaging only one of the four casting bosses. The Scanner can see which one their team should attack, and guides other players to her. Once a copy is defeated, she leaves behind a glowing orb, identical to the one that started this encounter. It stays on the ground for a brief amount of time and has to be picked up by a player to prevent a wipe. Taking the orb gives that player the Atraks-1 Replication debuff which lasts for 40 seconds. If the debuff expires, that player dies and a copy of Atraks-1 spawns on their corpse and resumes her cast of Replicated Ruin, which kills the team.
The orb is seen on the character model, and the Operator can shoot it to drop it to the ground, allowing it to be picked up again and refreshing the debuff's timer. The fireteam can dispose of the Atraks-1 Replication by dropping it in an airlock. There are four of them on the Morning Star, two on each side, one on each floor, with Operator panels by their doors. After a door is opened, it will slowly begin to close on its own, and will not be available until two other doors have been opened. Players left behind in an airlock also die. The Operator can also send empty elevators for their teammates in either Crypt or Morning Star by shooting panels by each elevator.
When Atraks-1's health is reduced to the bar's final segment, her copies will disappear from the Crypt, and she will spawn more of them on the Morning Star. All of them will cast Replicated Ruin, and the Scanner has to find the correct one for their team to attack.
Copies of Copies
To complete the Replication challenge, the fireteam must not dispose of the Atraks-1 Replication debuff. It can be safely dropped to the ground and picked up to refresh its duration, but dropping it inside an airlock fails the challenge.
Notes
- Operator can remove the orb from themself by standing close to a wall and shooting it with a weapon that uses Ricochet or Seraph Rounds.
- It is possible to push the orb out of the airlock when running out.
- Dealing damage to a wrong copy does not trigger a wipe until the final phase, and can be used as a method of finding the correct copy if Scanner is unavailable. Only damaging the marked one reduces the boss' health.
Morning Star
Descent
Objective
Prevent Europa's destruction.
Description
After the jumping section, the team will arrive at Rapture. The encounter area is a large room where players will have to disarm Nuclear Cores by carrying them from their spawners to the correct deposit bins. Taniks, Reborn stalks the room, he is immune to damage and cannot be defeated during this encounter, and he causes the Nuclear Cores to spawn, which is announced with sirens. All three augments are actively used here, they are carried by Vandals when the encounter begins. There are three terminals in this room: one in the middle, one on the left side, one on the right. ![]() Overload Captains spawn throughout the encounter.
Overload Captains spawn throughout the encounter.
There are four Nuclear Core spawners in the room. Two of them are in the farthest sides of the room, one on left wall, another on the right wall. Two other are on the big orange cistern above the middle of the room, one on the left, one on the right. Each spawner has an Operator panel by its side. When Taniks spawns the Cores, three of the spawners begin to emit a yellow glow. After a brief amount of time, the glow turns into the Nuclear Cores. The Operator has to shoot a panel near one of the active spawners to prevent it from creating the third core.
There are four orange boxes in the middle of the room, each has a gray deposit bin by its side. When Taniks spawns the Cores, the Scanner has to locate the two boxes with glowing yellow grids over them, and guide other players to deposit cores into the bins adjacent to these boxes. If the Operator fails to prevent the third core from spawning, the Scanner has to locate the third box as well.
The Suppressor has to stun Taniks, Reborn to unlock the deposit bins, which allows their teammates to get rid of the Nuclear Cores. There are three gray orbs floating in the room: one in the middle, one on the bridge to the right, one on the bridge to the left. When Taniks spawns the Cores, the Suppressor has to deal damage to him while standing under each of the orbs. Once Taniks is stunned, one of the augmented players receives the Deactivated Augment debuff, which prevents them from using their current or any other augment for a minute, the timer starts to count once the player takes off their augment.
Nuclear Cores last for ten seconds after spawning, and if one expires, the fireteam dies. When a player picks up a Core, they receive the stacking Radiation debuff. Once it reaches ten stacks, that player dies and the Core drops to the ground, where it will expire unless picked up by another player. Depositing a Core into a wrong bin kills the player due to Mismatched Polarity, and their Core is dropped and has to be picked up by someone else.
The Cores have to be disarmed six times, as indicated by green lights in the middle of the encounter area. Once the last batch of Cores is dealt with, a hatch in the middle of the room will open. The players have to enter it and rush into the saferoom with Taniks chasing them. At least one player has to make it to safety for the encounter to be successfully completed.
Of All Trades
The Disarmament challenge requires each player in a full raid team to successfully use the Operator, Scanner and Suppressor Augments during the encounter.
Taniks, the Abomination
Objective
Defeat Taniks, the Abomination.
Description
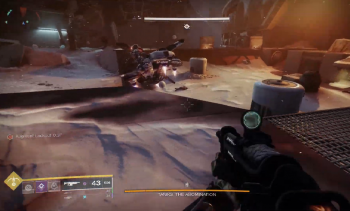
The fireteam will crawl out of the space station's remains to the entrance of the Deep Stone Crypt, with Taniks lying in a pile of wreckage in the middle of the area. Approaching or attacking him starts the encounter.
The encounter area can be divided into three sides, each contains a terminal, two deposit bins, three Suppressor orbs, and spawns enemies with certain augments. The area right by the Raid Banner is where the Operator augment spawns. The next area clockwise is where the Scanner augment spawns, and the area right by the Crypt's door is where the Suppressor augment spawns.
When the battle begins, Taniks, the Abomination stays in the middle of the encounter area, attacking players with his Scorch Cannon. After a while, he moves over to one of the three augment areas and casts Turbulent Barrage, Void pillars which kill players who failed to run out of them in time. During this attack, four lights become visible on Taniks, destroying them drops Nuclear Cores. All four Cores have to be deposited into the correct bins to start the damage phase. The Scanner can see the correct deposit bins, and the Suppressor can unlock them by stunning Taniks, like in the previous encounter. It is not necessary for all four Cores to be deposited in one go, but it is possible to do so, making the Scanner augment useless as deposit bins in the area occupied by Taniks are never the right ones. Once Taniks starts to lose his Cores, he casts Chaotic Collapse, which traps a random player and anyone nearby in a Void bubble that can be destroyed only by the Operator.
If less than four cores have been deposited, Taniks eventually returns to the middle of the stage and repeats the previous part of the encounter. If all four cores are deposited, Taniks teleports to the middle of the stage and covers himself with a Shock Field, an Arc dome with debris flying in circles around it. Taniks loses immunity, but the team has to be inside the Field to be able to damage him. It is possible to stay inside of it without being hurt, if players do not stand too close to the boss. Debris can hit players, which kills them. Taniks pushes players out of the dome a couple of times during the damage phase, then he dispells it and players have to deposit cores again.
Once Taniks is at the last segment of his health bar, he loses the Shock Field and stays susceptible to damage, but begins to teleport around the encounter area, casting Turbulent Barrage. Players have to quickly finish him to prevent a wipe.
The Core Four
Players can complete the Abomination challenge by depositing all four Nuclear Cores at once before each damage phase.
Rewards
Each encounter has a specific loot pool. Additionally, there are two hidden chests which drop Deep Stone Crypt Raid Mods and random rolls of gear the player has already acquired. Completing the last encounter gives access to the Cache of the Crypt: a special chest which can be used to spend Spoils of Conquest to obtain additional reward from a specific raid encounter or random rolls of gear the player has already acquired.
All Legendary weapons that drop from this raid have Weapon Patterns that can be learned through Deepsight Resonance extractions, allowing them to be Shaped. The first weapon purchased from the Cache of the Crypt will be guaranteed to have Deepsight Resonance. Harmonic Alloys are needed to craft them, and can be obtained by dismantling craftable Legendary weapons obtained from raids.[1]
Crypt Security
Atraks-1, Fallen Exo
Descent
Taniks, the Abomination
Extra
- Crypt Reawakened is a Triumph reward for completing the raid.
- Long Slow Whisper is a Triumph reward for completing the raid within the first 24 hours of release. It cannot be obtained anymore.
- No Love Lost is a Triumph reward for collecting all Exo Stranger logs in the raid.
- Cryptic Insignia is a Triumph reward for opening all hidden chests in the raid.
- Cryptic Legacy is a Triumph reward for completing the raid without any deaths for entire fireteam.
- Retrocausality is a Triumph reward for bringing all Fallen Pikes from the starting heat bubble to the final in the Desolation section of the raid.
- This Triumph can be completed only with a full fireteam.
Mods
Patch History
- 6.3.0.5[2]
- 6.3.0.4[3]
- 6.3.0[4]
- UNLISTED: Deep Stone Crypt weapons have been re-issued with new perk pools and a new Origin Trait, and can now be crafted. The first weapon purchased from the Cache of the Crypt in a given week will be guaranteed to have Deepsight Resonance.[1]
- 4.1.0.2[5]
- Removed Powerful rewards from Deep Stone Crypt when it’s not a weekly featured Raid.
References
- ↑ Jump up to: 1.0 1.1 "This Week at Bungie – 10/27/2022" Bungie, posted by A_dmg04, 27 Oct. 2022, https://www.bungie.net/en/Explore/Detail/News/51865.
- Jump up ↑ "Destiny 2 Hotfix 6.3.0.5" Bungie, posted by Destiny 2 Dev Team, 24 Jan. 2023, https://www.bungie.net/7/en/News/article/hotfix_6_3_0_5. wikipage
- Jump up ↑ "Destiny 2 Hotfix 6.3.0.4" Bungie, posted by Destiny 2 Dev Team, 18 Jan. 2023, https://www.bungie.net/7/en/News/article/hotfix_6_3_0_4. wikipage
- Jump up ↑ "Destiny 2 Update 6.3.0" Bungie, posted by Bruno Louviers, 6 Dec. 2022, https://www.bungie.net/7/en/News/article/destiny2_update_630. wikipage
- Jump up ↑ "Destiny 2 Hotfix 4.1.0.2" Bungie, posted by BrunoLouviers, 7 Jun. 2022, https://www.bungie.net/en/Explore/Detail/News/51440. wikipage
