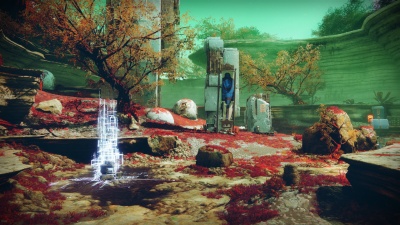
Battleground: Behemoth
- See also: Battleground: Behemoth (Quest)
| Battleground: Behemoth | |
|---|---|

| |
| Information | |
| Location | Nessus |
| Players | 1-3 |
| Power | 1100 |
| Expansion | |
| Enemies | Cabal, Vex |
| Boss | Commander Dracus (Legionary) |
| Description | Empress Caiatl has deployed a tank fortress to Nessus and opened an invitation to survivors of the Red Legion to vie for a seat on her War Council. Vanquish the Cabal and prove yourself in glorious combat against her Chosen. |
Battleground: Behemoth is an Arena introduced in the Season of the Chosen. It was originally part of the Battlegrounds playlist.
With the release of The Witch Queen, and the removal of the Season of the Chosen content, it is now only available through the Vanguard Ops playlist as a randomly-chosen Strike. It cannot be launched as a mission directly from the Director. The version from the Battlegrounds playlist with Champion enemies is also not available.
Walkthrough
The Tangle
Upon spawning in The Tangle, immediately prioritize the Thresher ship overhead, which poses a significant threat with its lock-on missiles. Use nearby rocks for cover to avoid its attacks while damaging it. The area contains both Cabal and Vex enemies fighting each other, including Barrier and Unstoppable Champions. Focus on eliminating the Cabal first, allowing the Vex to assist in reducing their numbers. Among the enemies, a Barrier Hobgoblin and Cabal Champions (randomly either Barrier or Unstoppable) will spawn.
Push up the hill on the right for high ground and cover, using abilities to clear adds and fill Transcendence bars. After clearing the initial wave, Cabal drop pods will spawn enemies, including a Keymaster (a yellow-bar enemy, potentially a Bane). Defeat the Keymaster to obtain an access key. Repeat this process to collect three keys: the second Keymaster spawns after killing one Champion, and the third after defeating two Champions and another Thresher. Avoid pushing too far forward to prevent being hit by drop pods. Once all three keys are collected, deposit them at the Access Granted terminal, grab ammo from nearby crates, and proceed to the next area.
Watcher's Grave
In Watcher's Grave, the objective is to destroy three targeting arrays by throwing power cells at their generators. The area is open, with enemies spawning at three distinct points. Set up on high ground, such as the left-side pipework or right-side cliff, for better visibility and cover. Clear initial waves of Scions and Phalanxes until an Unstable Incendior spawns via drop pod, dropping a power cell upon defeat. Pick up the cell and throw it at one of the orange generators to destroy it, but avoid standing too close to prevent self-damage.
The second wave includes an Unstoppable Champion alongside more enemies, spawning on either the right or left side. Clear minor adds before focusing on the Incendior for the second power cell. The third wave spawns two Unstoppable Champions, a Barrier Champion, War Beasts, and additional enemies like Colossus and Legionaries. Prioritize minor adds, then the Incendior for the final power cell. Destroy all three generators to proceed. Note that drop ships in this area do not have turrets, so focus on add control.
Rite of Proving
Activate the podium to begin the Rite of Proving and spawn Commander Dracus, the boss, along with waves of adds. Stay near the podium area, using rocks for cover to snipe enemies and avoid drop pod impacts. Dracus wields a shotgun that can one-shot players, so maintain mid to long-range distance. Clear adds to create breathing room, then damage Dracus until he loses one-third of his health, at which point he becomes immune and retreats up the hill.
Two Champions (a Barrier and an Unstoppable) spawn; defeat both to remove Dracus' immunity. Continue damaging him until he reaches half health, when he spawns a dome shield. Enter the shield to destroy the generator inside, using cover to avoid Dracus’ attacks. Be cautious, as adds may spawn behind you. After destroying the generator, fall back to a safe distance.
For the final third of Dracus’ health, he retreats to the entrance of the land tank, surrounded by walls and adds. Two more Champions (a Barrier and an Unstoppable) spawn when he becomes immune again. Clear them to remove his shield. At the halfway point of his last health bar, Dracus may spawn another dome shield; destroy the generator if it appears. Use supers and heavy weapons to finish him off, staying on the left-side cliff or pipelines for cover and sniping opportunities.
Reward
The Nightfall version of this strike has a chance to drop the Wild Style.
| |
|
| |