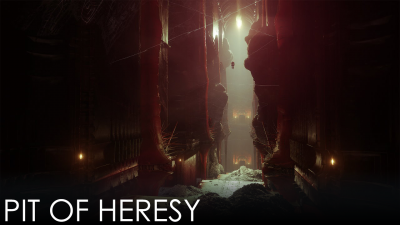
Pit of Heresy
| Pit of Heresy | |
|---|---|

| |
| Information | |
| Location | Moon |
| Players | 1-3 |
| Power | 1100 |
| Requirement | |
| Expansion | |
| Enemies | Hive |
| Boss | Zulmak, Instrument of Torment (Knight) |
| Description | Deep beneath Sorrow's Harbor, the Hive keep their darkest secrets. |
Pit of Heresy is a dungeon introduced in Shadowkeep.
Contents
Overview
Enemies Encountered
Boss
- Zulmak, Instrument of Torment (Knight)
Walkthrough
Players begin at the entrance to the Scarlet Keep. On the elevation just ahead there is a crystal chained above the barrier which is covering a hole in the ground. The barrier disappears, allowing the team to descend into the dungeon. The path to the first encounter is pretty straightforward and ends at the precipice before the first encounter, where a Raid Banner can be planted.
Necropolis
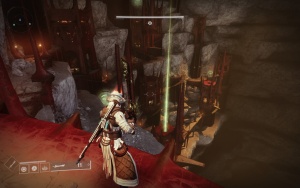
There are multiple scarlet towers with Hive runes above them, some of them have elevators in the middle, or entrances to side-rooms where they connect with the wall. These rooms are blocked until nearby Pit Keepers, Knights with Boomers, are defeated. The towers are also guarded by Acolytes wielding both Shredders and Soulfire Rifles, and powerful Ogres patrol the bridges between them.Players have to find a tower marked with a symbol resembling letter "A", which leads to a room with an Accursed Swordbearer, a Knight that drops a Hive Cleaver when killed. There is a set of three runes chained to a couple of pillars in the middle of this room, they mark the towers with rooms which contain special Broken Blade enemies, the runes can also be seen in their rooms. Players have to locate and defeat these enemies using Cleavers to finish the encounter. Additional Accursed Swordbearers spawn throughout the encounter, players can obtain more Cleavers from them if needed.
The Might of the Broken Blade is a Knight armed with a sword and a shield, it takes damage only from the Cleaver's light and super attacks. The Omen of the Broken Blade is a Wizard, it takes damage only from the Cleaver's heavy attack, which launches a projectile. The Oracle of the Broken Blade is a Shrieker, it takes damage only from its own attacks, redirected at it by blocking them with the Cleaver. Once the last of them is defeated, a beam of pale green light will appear at one of the towers, which contains an entrance leading further into the dungeon.
The team will arrive to a wall full of doorways, they push any player standing in front of them into the abyss. There is also a crack in the wall, located slightly to the right and down, it leads to the next area.
 The Journey — Descent
Each of the doorways contains a chained rune, except for one in the upper left part of the wall. That doorway is the only one which does not try to kill whatever stands in front of it. The player on the Journey quest has to interact with a rune inside this doorway to proceed to the next step. If there are several players with this quest step in the dungeon, they all get credit for it, even if only one person touched the rune.
Tunnels of Despair
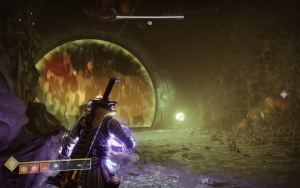
After going through the crack in the wall and following the path further down into the pit, the team will arrive to the Tunnels of Despair. There will be three paths in front of the players. The leftmost path lies by an abyss with giant bones and greenish mist, the rightmost path lies by several locked doors. Each path leads to a sealed gate with a receptacle nearby. Players have to unlock all gates by depositing a Void orb into each of the three receptacles.The three tunnels are patrolled by Harrowing Pariahs, powerful Ogres which cannot be damaged or killed. There are also smaller tunnels between the main ones, their entrances are blocked by a reddish substance which can be destroyed with enough damage. Ogres cannot enter these smaller tunnels, but they are filled with Thralls. They also contain Heretical Knights armed with Splinters, they drop Void orbs when defeated.
 The Journey — Discovery
There is a circular plate on a ledge under the leftmost path, by the abyss. Interacting with it spawns several plates above the abyss, leading to a shiny orb. This orb has to be carried to the opposite side of the encounter, the rightmost path, and used to light two saucers by each side of a certain door.
 The Journey — Slay Volmâr, the Tempted
Lighting the saucers opens the door leading to the hidden boss, Volmâr, the Tempted. There is no reward for defeating her, but she has to be killed to progress the Journey quest.
Her stage consists of two rooms: the entrance, and the main room. Each corner of the entrance room contains an orb corresponding with a certain element, and a Hive rune above each, marking them. The main room consists of two floors: the open area below and the paths along and across the walls above. There are four saucers with Hive runes above them in each corner of the main room, two on each floor. A shiny orb can be picked up in the center of the main room's top floor.
When players confront Volmâr they receive a certain Dread buff, which determines what kind of damage they will be able to deal to her. This buff refers to the elements as Neutral (Kinetic), Thunderous (Arc), Fiery (Solar) and Abyssal (Void).
Players have to memorize a rune corresponding with their Dread in the entrance room, then pick up the shiny orb and light a saucer with the same rune in the main room. Doing so will switch their Dread buff to its Vengeance version, allowing the player to damage Volmâr with the buff's element. The Vengeance buff expires after 30 seconds, and the player receives a new Dread. ![]() Neutral saucer is located on the top floor of the main room, in the closest right corner.
Neutral saucer is located on the top floor of the main room, in the closest right corner. ![]() Thunderous saucer can be found in the closest left corner on the bottom floor.
Thunderous saucer can be found in the closest left corner on the bottom floor. ![]() Fiery is in the far right corner, bottom floor.
Fiery is in the far right corner, bottom floor. ![]() Abyssal is in the far left corner, top floor.
Abyssal is in the far left corner, top floor.
There are no buffs for ![]() Stasis, but having this subclass equipped might cause Volmâr to bug out and accept any type of damage dealt to her by the player.
Stasis, but having this subclass equipped might cause Volmâr to bug out and accept any type of damage dealt to her by the player.
Chamber of Suffering
Each of the three gates in the tunnels leads to the next encounter, where the team can plant a Raid Banner. The entrance further into the dungeon is just across the room, but it is blocked with a yellow substance and locked with six locks. These locks have to be removed to finish the encounter, the substance can be destroyed with enough damage afterwards. There is a circular plate with a totem above it near this entrance. The totem occasionally goes red, killing all players in the encounter, they have to stand on the plate to prevent this. There is a receptacle near the door, but outside of the plate, players have to deposit Void orbs dropped by Heretical Knights into it. Each orb removes a single lock from the exit.When the encounter begins, the players will be attacked by Thralls, Cursed Thralls, Acolytes wielding Shredders and Heretical Knights from each of the three gates from the previous area. There are also two balconies above, Knights armed with Boomers spawn on them each time a lock is removed. All players also receive a stacking Curse of Suffering debuff, which increases all damage received during this encounter. The Curse gains stacks on its own, but they can be reset back to one by depositing an orb.
After completing this encounter and going through the previously locked entrance the team has to jump down, carefully dodging the spinning spiky bars of death and land on a ringed platform above the abyss. There are three Hive runes somewhere on the wall during the fall, someone has to memorize them for the next area.
Harrow
The team has to look for three Malevolent Ritualists, Wizards, which have to be defeated to unlock the entrance to the next encounter. The three runes seen during the fall point to their location in the Harrow.This area has no clear paths and is filled with chasms and moving obstacles which kill players on touch. The Wizards and the Acolytes which guard them are the only enemies in this area, so the player can just use their radar to locate the Ritualists. To help with that: when a player is standing with their back to the exit (which is blocked when at least one Malevolent Ritualist is alive in the area), there are three spots where these Wizards can spawn in the tunnels to the right, and three more spots to the left.
Cradle of Damnation
After defeating the Wizards and finding the exit the team will arrive to another place where they can plant a Raid Banner, leading to the boss stage.
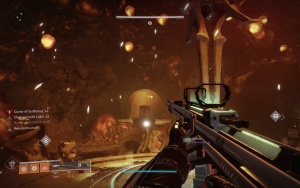
Zulmak, Instrument of Torment is a huge flaming Knight armed with a sword. He stays on the plate in the middle of his arena, and attacks players with the sword, throws Solar projectiles at them, and has a ground slam attack. Zulmak is immune, players have to deposit a Void orb into each of the three receptacles around his plate to start the damage phase. The orbs are dropped by the Broken Blade enemies, which function just like in the Necropolis and can be found on small stages connected to the main arena. When entering the Cradle, the Knight is on the left, the Shrieker is in front of the players, and the Wizard is to the right. Heretical Knights spawn around the plate, they carry Cleavers and drop them when defeated. Zulmak is also protected by Acolytes with Shredders and Thralls.It does not matter which orb is placed into which receptacle, but once all three are deposited, the damage phase begins. By staying on Zulmak's plate the players receive the Heinous Rite buff, which allows them to damage the boss. Zulmak keeps fighting and gains a new attack, which sends out a wall of fire in front of him, similar to a Voidwall Grenade, but Solar. Cursed Thralls spawn instead of the ordinary ones during this phase. The Heinous Rite lasts for 30 seconds, then the damage phase ends and all players still standing on Zulmak's plate instantly die. His plate can be walked on after this mechanic is done.
Zulmak does not enrage and the process of depositing orbs and dealing damage to him can be repeated until he is defeated or the players give up.
Rewards
- All weapons and armor from the Moon essence quests and Altars of Sorrow, as well as the Premonition Pulse Rifle, can be obtained from this dungeon.
- Xenophage is obtained as the reward for The Journey quest, which requires the player to trigger and complete a hidden encounter.
- The Bane of Tyrants ship can drop only from the final encounter, but it is not affected by the weekly lockout and may still drop if the player already received their weekly loot from the dungeon.
- Completing associated Triumphs rewards the Sanguine Static and Crimson Echoes Emblems.
|
|


