The Whisper
| The Whisper | |
|---|---|

| |
| Information | |
| Season | 3 |
| Type | Exotic Mission |
| Quest | Arsenal of Oddities |
| Start | The Anomaly (Normal) |
| Location | Grove of Ulan-Tan, Lost Oasis, Io |
| Recommended Power | 750 |
| Enemy Types | Taken |
| Bosses | Taken
|
| Rewards | |
| Equipment | Whisper of the Worm |
The Whisper is a hidden mission introduced with the Warmind expansion. It is the means of obtaining Whisper of the Worm, Whisper Catalyst, and the Enigmatic Blueprint for A Thousand Wings.
The normal difficulty is accessible during a public event. Completing the Normal difficulty will unlock the Heroic difficulty, which will become accessible directly from the Director map. As of Season of Arrivals, both difficulties are accessible on the map with the requirement removed.
The activity has a 20 minute timer, which will conclude the activity and transport to Lost Oasis.
Contents
Normal
Preparation
During a public event in Lost Oasis, one taken boss will spawn in the area:
- Drevis, Aspect of Darkness
- Ta'aurc, Aspect of War
- Urzok, Aspect of Hate
Killing this boss will spawn The Anomaly portal at an open area of Lost Oasis. Interacting with the Anomaly will teleport the fireteam to an instance of The Whisper mission.
Walkthrough
Objective
Anomaly Collapse
- Time remaining: 20:00
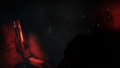
The fireteam spawns at the entrance of Grove of Ulan-Tan, the enemies that usually reside in the area will despawn, and a blight will spawn in an upper cave. This cave can be seen between the area entrance and the opening of the final room. Climbing into the cave will lead to the blight, which is covering a chasm into the activity proper.
This level has two stages: Parkour and Combat.
Parkour

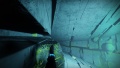
The path leads downward, but is perilous with tight ledges and moving obstacles, and a pitfall in almost every room. Jump through the crevice across a pitfall to enter the first room. This room has a lower ledge to jump to, leading to a crawl-space entry through the wall into the second room. The ledge extends along the wall, and ends with a plunge onto a lower ledge: which is plagued with lethal moving-wall obstacles. At the end of the obstacles is a floating-step path across the room, leading to a ledge wrapping a massive column. Follow left along the ledge, then jump sharply right around the corner to another ledge. There is another slower moving-wall obstacle, but this time it is within a crawl-space. After this obstacle, the path jumps left across toward another ledge along the opposite wall of the room. There will be a small elevator that will transit to a higher ledge, which contains the entrance into the third room; take a sharp left into the alley and hop through a corridor of moving-walls.

The third room has a jumping path across small ledges, some have wall knockers that will occasionally fire. Upon crossing halfway, two Taken Vandals will spawn at opposite ends of the room as sentries of the path. At the end of the room is a small gate that intermittently closes, but there is a small foothold to wait before it opens again. This will lead into the fourth room, which has a set of two rows of port holes each decorating opposite walls. Most of the holes will chute into the pitfall, the hole at the far upper-right chutes into the next room. The fifth room has a serene setting, with notable patches of grass. There are holes in the ground that will lead to the room's basement, where Shadow Thralls will spawn infinitely; there are ramps in the basement that will lead back into the room. The path continues within a dark crawl-space just below the room entrance, dropping to a separate part of the basement that leads to the sixth room. Follow along the left ledge then plunge down into a visible opening, this enters into a small corridor that will lead to the combat stage.
Combat
There are a total of three rooms that contain enemies, taken blights, and wall knockers. The doorway to the next room is blocked, requiring all enemies to be eliminated to turn into a blight.
Upon entering the third room, two Taken Centurions will spawn back in the second room.
Boss
The final room will contain enemies, taken blights, and wall knockers. Eliminating the enemies will spawn another wave of enemies including the first boss. After the first boss is eliminated, the rest of the bosses will spawn in. Killing the bosses will complete the encounter and despawn the enemies.
- Drevis, Aspect of Darkness
- Ta'aurc, Aspect of War
- Urzok, Aspect of Hate
Heroic


Preparation
The Heroic difficulty increases the durability of the enemies, and introduces new mechanics in the Parkour stage that divert from the normal path. Only the Parkour stage requires an explanation.
Walkthrough
Objective
Anomaly Collapse
- Time remaining: 20:00
Parkour
There are five chests hidden throughout the level, and an oracle puzzle at the sixth room that will grant another chest. Each of the five chests drop ![]() 4 Phaseglass Needles and 1 Blighted Essence.
4 Phaseglass Needles and 1 Blighted Essence.
In the first room there is a small opening faintly lit between the jump across the pitfall, this leads to a small chamber housing the first chest. In the fourth room, the far upper-left hole will chute into the chamber housing the second chest. The exit for this chamber runs along the far wall, it is rather easier to access as an entrance. In the fifth room are two chests; there is a crevice to the left wall on ground-level that leads to the chamber of the third chest. The fourth chest is in a chamber above the entrance, this is reached through a climb up the left wall that follows around the room; footholds are marked with green patches of grass. In the sixth room, there are platforms across from the round ledge that lead to the Vex portal at the far side of the room. Behind the portal is a column to jump to that reveals a lit opening leading to the fifth chest. There are a couple of ledges above the chest that lead back to the platforms.
At the Vex portal, oracles will begin to spawn and chime. If five chests have been collected, seven oracles will eventually appear. The order they spawn and the input solution is referencing the oracle spawning in Destiny 1's Vault of Glass. There are three rounds; a round has the oracles blink in sequence, then all seven will spawn and the player will kill a select number of them. An oracle will chime to accept the input, then respawn.
| Round 1 | Round 2 | Round 3 | |
|---|---|---|---|
| Oracle turn | 4-2-6 | 7-5-3-6-2 | 1-5-3-2-6-7-4 |
| Player turn | 1-3-5 | 4-6-7-3-1 | 7-3-1-6-4-2-5 |
Success will spawn a chest that rewards ![]() 12 Phaseglass Needles and 1 Blighted Essence. The Enigmatic Blueprint will drop upon the character's first opening of the chest.
12 Phaseglass Needles and 1 Blighted Essence. The Enigmatic Blueprint will drop upon the character's first opening of the chest.
Chest 1: There is a faint lighting from the chest room. (At middle)

Chest 2: The far upper-left chute leads to the chest. There is also an entrance ledge along the far wall.

Chest 3: The dark crevice leads to the the chest. (At left)
Chest 4: There is a small grass patch indicating an opening. (At left)

Chest 5: Arriving at the column will reveal openings toward the chest. (At left)


